How to use Stable Diffusion plugin in Photoshop?

Tired of spending hours editing your photos in Photoshop? Then you need to check out the Stable Diffusion plugin. Once you have installed the plugin, you can use it to smooth out your images automatically. The best part is that you can use it with any photo. In this post, we’ll show you how to use the Stable Diffusion plugin in Photoshop and transform your photos into stunning works of art. So buckle up and get ready for some serious photo magic.
What is Stable Diffusion Plugin?
Stable Diffusion plugin is a Photoshop plugin, that makes use of an advanced artificial intelligence algorithm to automatically retouch photos. The plugin reduces the amount of time and effort required to manually retouch photos. Here we are working with the plugin created by Abdullah Alfaraj.
The Stable Diffusion plugin analyzes the photo to be retouched and automatically applies the necessary edits. The plugin can be configured to retouch photos with different levels of intensity, from light retouching to more aggressive modifications. The plugin can also be configured to preserve certain features of the photo, such as skin texture or hair color.
To download the Stable Diffusion plugin click here
It also supports ControlNet API, if you are unaware of the concept then, ControlNet is a Stable Diffusion plugin that lets you adjust text-to-image diffusion models by adding extra conditions, which makes generated pictures more accurate.
How to Install the plugin?
Installing the Stable Diffusion AI plugin for Photoshop is a simple process. Just follow these steps:
- Download the plugin from the above link or click here. You can download the .ccx file, it will be a simple process.
- Open the downloaded file. It will take you to the creative cloud desktop window.
- A prompt will be asked to give permission to install the third-party plugin. Click Install.
 Permission to install the non-market plugin
4. Open photoshop: go to plugin -> Auto photoshop Stable Diffusion Plugin -> Auto-Photoshop-SB
 plugin location
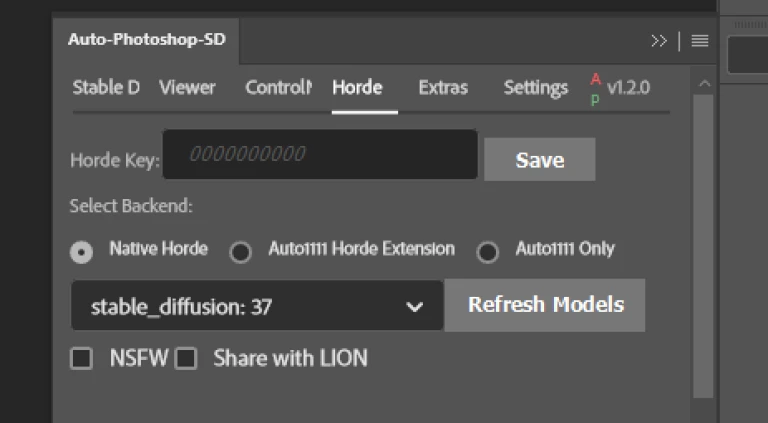
5. Next move the cursor to the tab section -> click on Horde by default it will be “Auto1111 Only” change that to “Native Horde” and we are ready!
 change the default to Native Horde
How to use the plugin?
If you’re a photographer or graphic designer, chances are you’ve used Adobe Photoshop before. And if you’re looking to add some artificial intelligence (AI) to your workflow, the Stable Diffusion AI plugin is a great option. Here’s how to use it:
- Open Photoshop and go to File > New > Image from File. Choose the image you want to edit or take a blank file.
- Click on the Adjustment Layer icon in the toolbar and select Stable Diffusion AI from the list of plugins.
- A new window will open up with all of the plugin’s options. For this example, we’ll leave all of the settings at their defaults and just click on the Run button. That’s it.
Major update: Automatic1111 @Gradio Photoshop Stable Diffusion plugin V1.2.0, ControlNet, One Click Installer and More, Free and Open Source
— AK (@_akhaliq) March 5, 2023
github: https://t.co/eqCBQLZPF8
reddit: https://t.co/3JSQXdpqSM pic.twitter.com/bfLRXivLQb
How AI will become an essential and useful tool for designers?
Various fields such as medicine, finance, manufacturing, and logistics, all use AI. However, its potential use in the design industry has not been completely exploited. The applications of AI in design can help designers create better designs faster and with less effort. In the future, AI will become an essential and useful tool for designers.
The use of AI in the design industry is enormous. For example, to generate ideas for designs, create prototypes of designs, and evaluate designs. to create personalized designs for individual users.
The use of AI in design will help designers keep up with the ever-changing trends in the design industry. It will also help designers save time and money by automating repetitive tasks. In the future, AI will become an indispensable tool for designers.
Benefits of using the plugin
- Quick and easy to use
- Can produce better and more interesting results
So finally we can conclude that adding this plugin will surely take your creations to another level. So don’t wait – get creative and explore what Stable Diffusion AI has in store!
Check out our article on Stable Diffusion on Smartphones!


