A Guide on How to setup BSC and import NFTs on Metamask
Metamask is a popular browser extension that makes it easy for users to securely interact with decentralized applications on the web. Let’s look at what Metamask is, how to set it for BSC-Binance Smart Chain(BEP-20 tokens) and import your NFTs to Metamask wallet.
We’ll go over the steps needed to create an account, fund it, and start sending and receiving tokens. Once that is done, we’ll look at how to import all of your NFTs on Metamask. Let’s get started.
What is Metamask?
Metamask is a decentralized wallet and has a browser extension that allows you to interact with decentralized applications (DApps) on the Ethereum network. To use Metamask, you must first install it as a browser extension. Once installed, you can create a Metamask account and add ETH to your account to start interacting with DApps.
To install Metamask,
- Visit the Metamask website.
- If you are using Chrome then Click “Get Chrome Extension” or “Get Firefox Extension”.
- Click “Add to Chrome” or “Add to Firefox” the same goes for Brave browser as well.
The next step is to create the Metamask account:
- Click “Create a Wallet”
- Enter your email address and choose a strong password.
- A seed phrase appears, note down the phrase somewhere safe.
- This seed phrase can be used to restore your account if you ever lose access to your Metamask account.
Once your account has been created, you can now add ETH to your account and Ethereum Mainnet will be your default Network.
What is a BEP-20 token?
BEP20 is a token standard that allows for the creation of tokens on the Binance Smart Chain. It’s like ERC-20, which is the token standard for Ethereum. BEP-20 tokens can be used in a variety of ways, including as a currency, to represent assets, or as a utility token.
How to set up Metamask for Binance Smart Chain network (BEP-20)?
- Log in to your Metamask account. (Ethereum Mainnet will be your default Network)
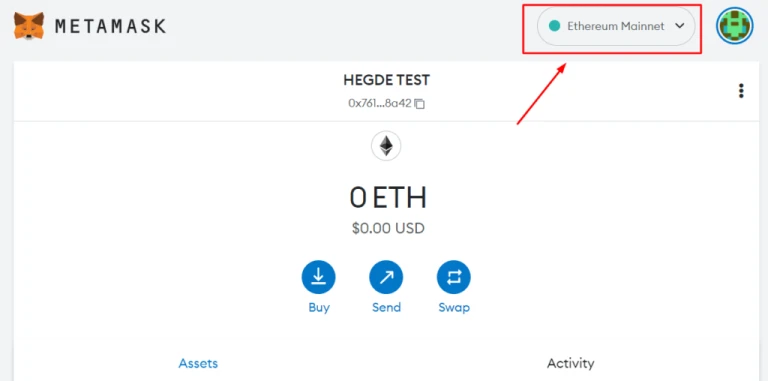 Metamask Homepage
2. Click on https://bscscan.com/
3. Go to the footer of the BscScan page.
4. Click on the “Add BSC network” option at the bottom-right of the page.
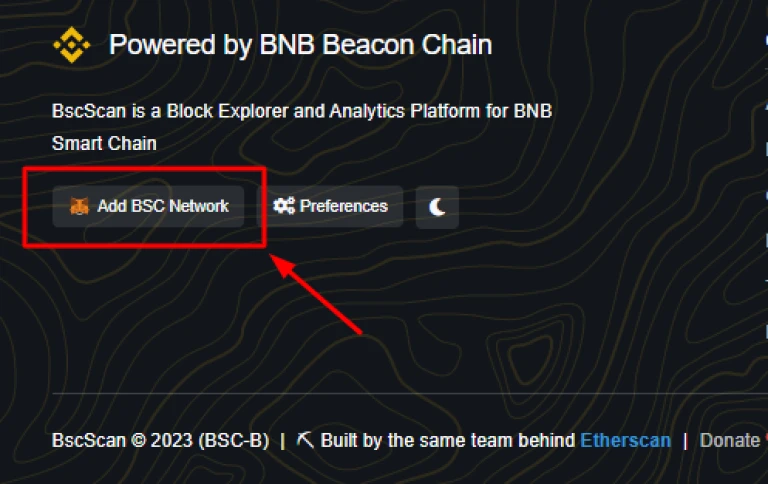 Click on – Add BSC Network
5. Metamask pop-up will appear, and it will ask for permission to approve the Network, and the following are the details present.
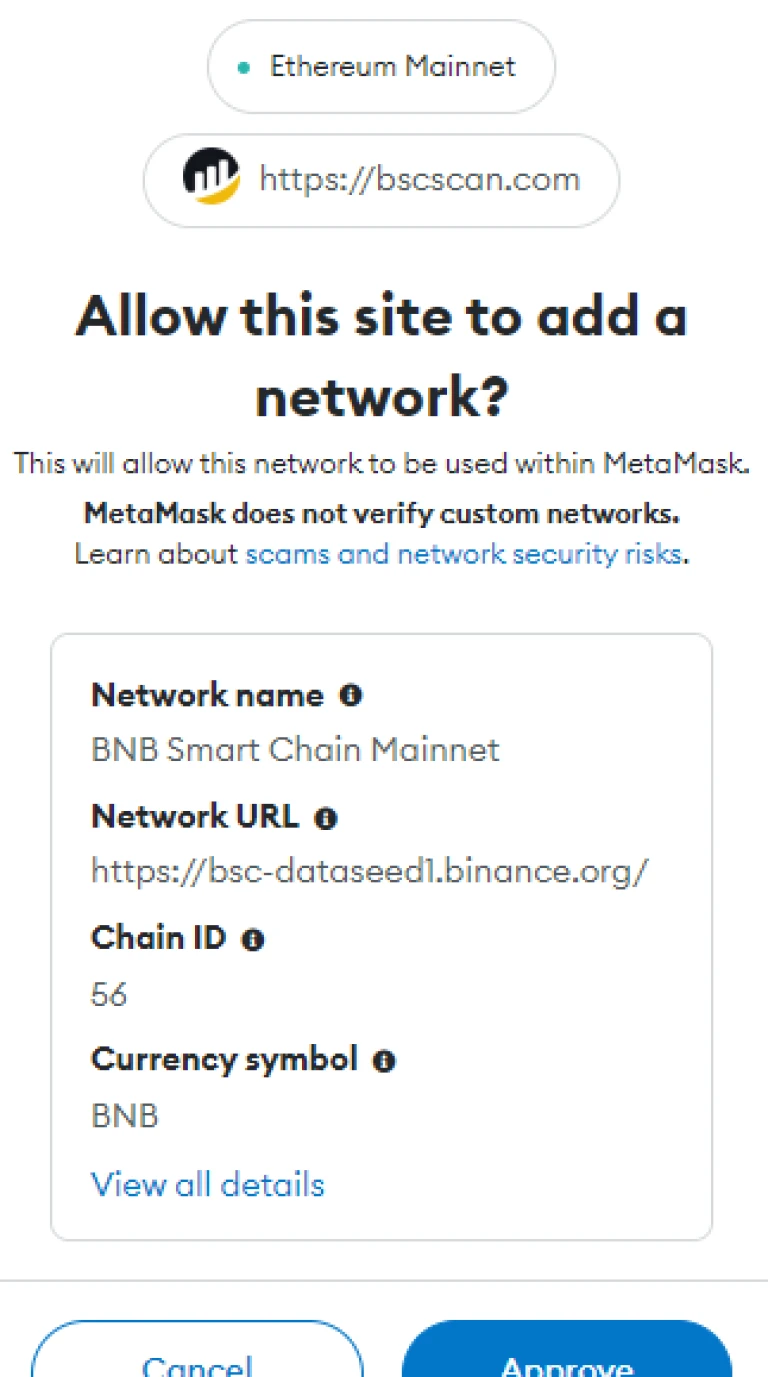 Adding BNB Network on Metamask
- Network Name: BNB Smart Chain Mainnet
- Network URL: https://bsc-dataseed1.binance.org/ (this is for reference. opening this will lead to a 404 error)
- Chain ID: 56
- Currency Symbol: BNB
6. Since your default network will be Ethereum Mainnet, the app will ask permission to switch to BNB Smart Chain Mainnet.
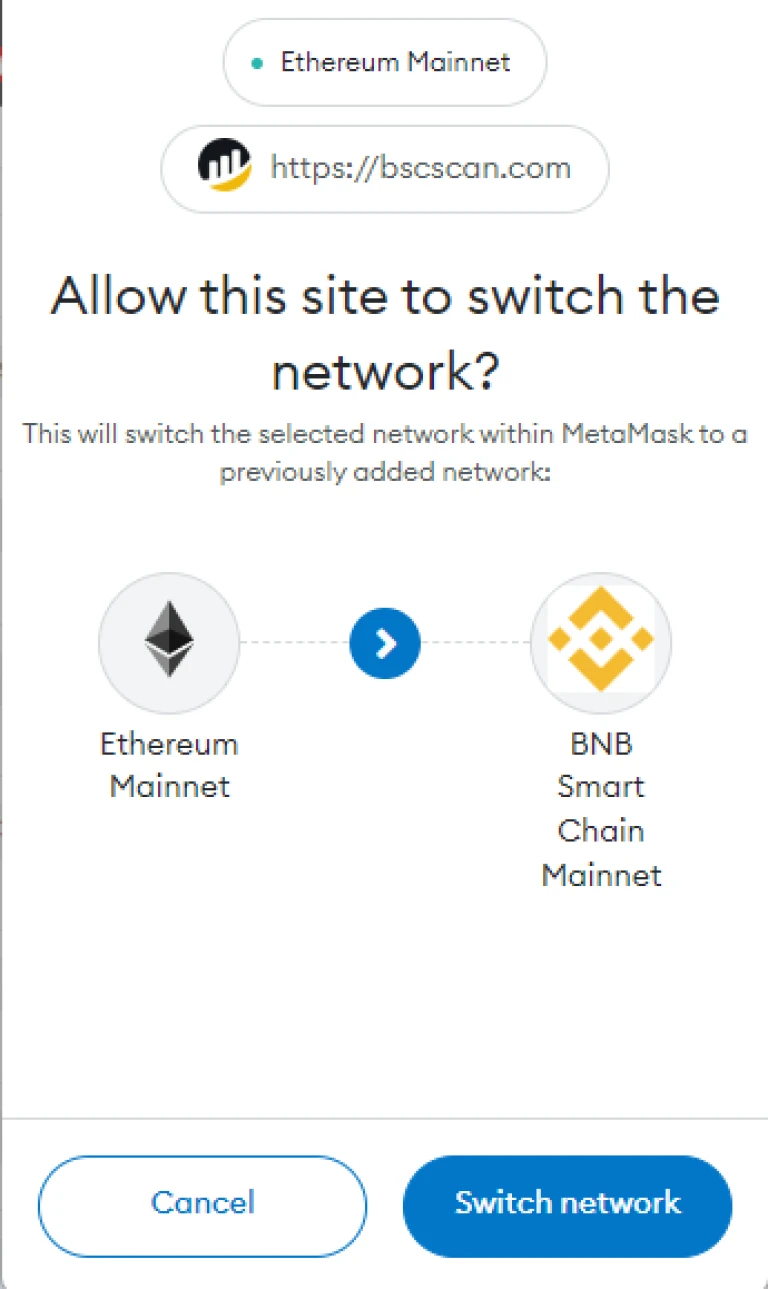 Switching from Ethereum Mainnet to BNB Smart Chain Mainnet
7. Click on Switch Network and that’s it. Done.
How to import NFT?
After this, Metamask will automatically try to import your NFTs. For this to happen, the “autodetect NFT” feature has to be enabled. To enable it, go to Settings -> Experimental -> “autodetect NFT”. You can choose to keep this off and add your NFTs manually to be on the safer side. Since this is still in the experimental phase and they require third party access, it’s better to keep this off if you are still new to world of web-3. Now, click on Import NFTs in the Metamask homepage.
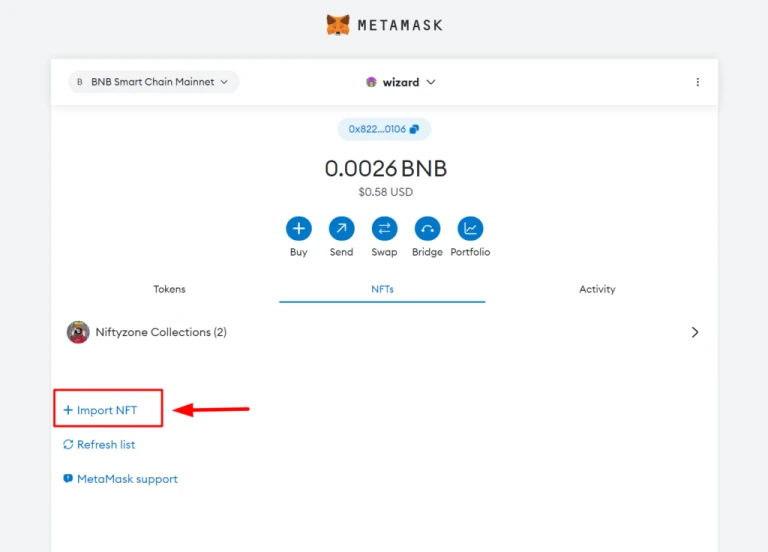
A window pops up asking for the contract address and Token ID.
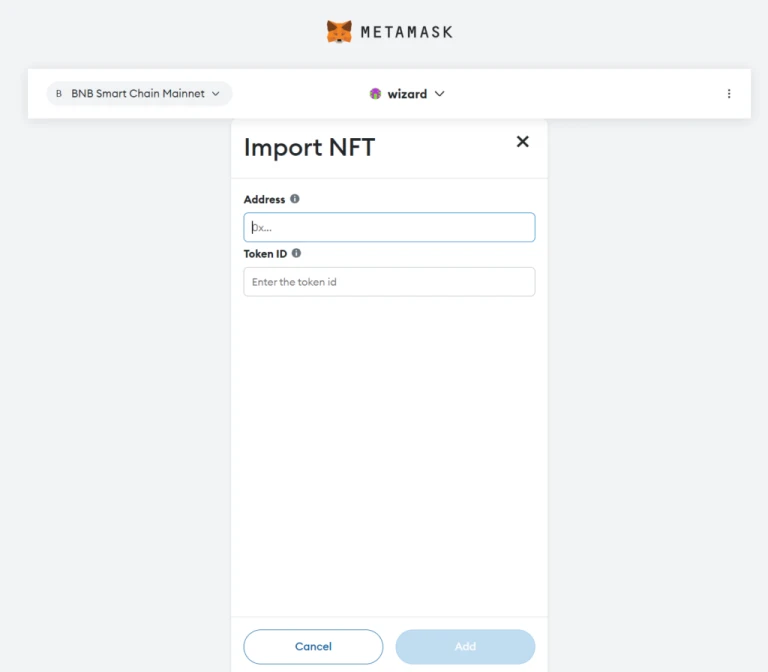
You can now open BscScan and enter your address there. You can copy the address from your Metamask wallet and paste it here.

Next, the website will show an overview page, where you can see token holdings.
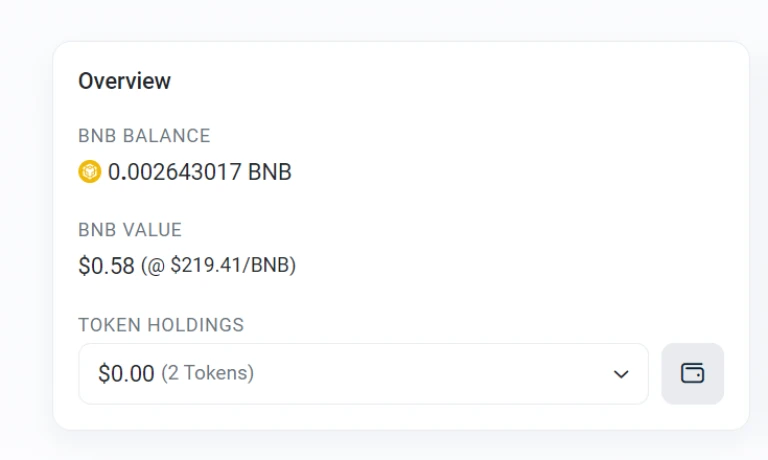
Click on the token holdings drop down menu and select “View all your holdings” and you will see all your BND holdings. Open them and you can see the address and token ID over there.
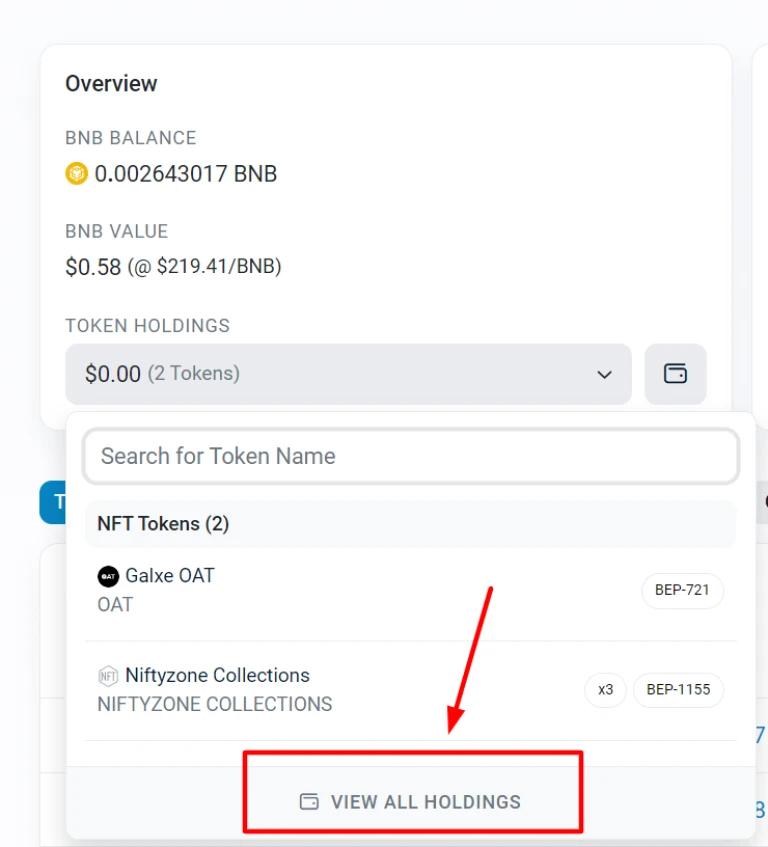
Just copy those two attributes (address and token id) to your Metamask wallet and click click submit.
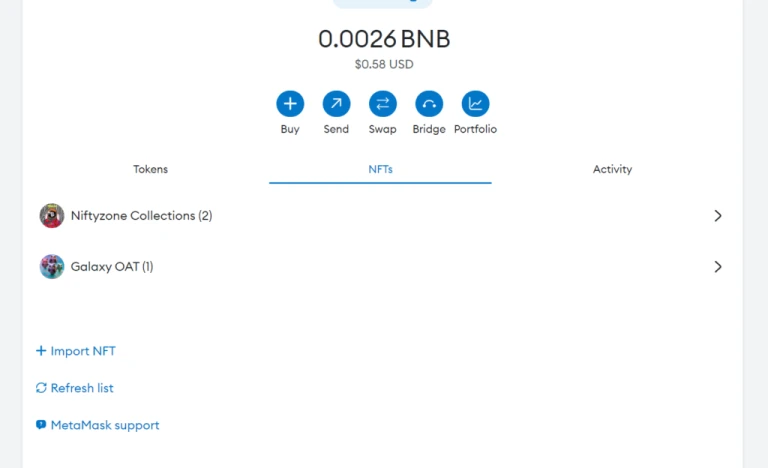
You can now see those NFTs in your Metamask wallet.


