Guide to Install Stable Diffusion WebUI on MacOS?
Stable Diffusion WebUI (SD WebUI) is an open source software that can generate images developed by AI AUTOMATIC1111. AI will generate an image based on the text-prompt given by the user; it can also imitate an existing image to create a new image with a different style. Even if you only give it a part of a image, AI can fill it with appropriate content based on your text-prompt. Furthermore, it supports self-trained models to improve the rendering effect. In this article we will discuss about Installing Stable Diffusion WebUI on MacOS.
Stable Diffusion WebUI can be run on macOS, thanks to Apple Silicon’s powerful GPU performance and Apple CoreML’s optimisation of the Stable Diffusion programme. However, while running on a laptop, be aware that AI generation will consume a significant amount of GPU resources; be conscious of heat dissipation.
Necessary System Configurations
To fully utilize the GPU for AI computing, it is recommended that you use a new version of Mac equipped with an Apple Silicon M chip (M1, M2). RAM needs to be greater than 8GB, hard disc space needs to be at least 10GB, along with a fast internet connection for downloading models.
Stable Diffusion requires an AMD discrete graphics card to run on older Macs. It is not advised to use it on a Mac with only Intel internal graphics.
Download the Stable Diffusion model on your Mac
Stable Diffusion requires an AMD discrete graphics card to run on older Macs. It is not advised to use it on a Mac with only Intel internal graphics.
HuggingFace has many different models that can be downloaded; whether you want to generate images of a photorealistic person or an anime style, there is a model for each different style. You must download at least one model.

The model is a critical foundation for generating AI images. Also the installation files are quite large. So it is best to download the model first. You can install multiple models at once.
Click on the link to download the model and choose the file with extension name .ckpt or .safetensors
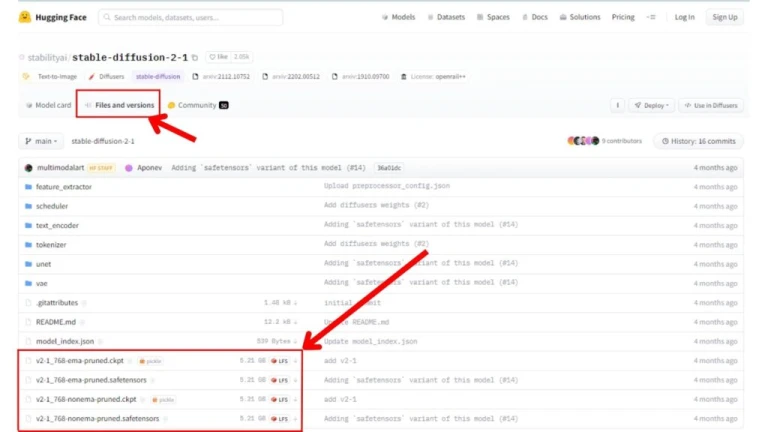
Save files to the download folder.
Step-by-step Guide for Installing Stable Diffusion WebUI
- Install the necessary tools required for installing SD WebUI
- Copy the Stable Diffusion WebUI repository
- Set the startup arguments
- Run Stable Diffusion WebUI
1. Install the Tools required for installing Stable Diffusion WebUI
Following tools are required to install the Stable Diffusion WebUI
- Homebrew
- Git
- Anaconda
Installing Homebrew:
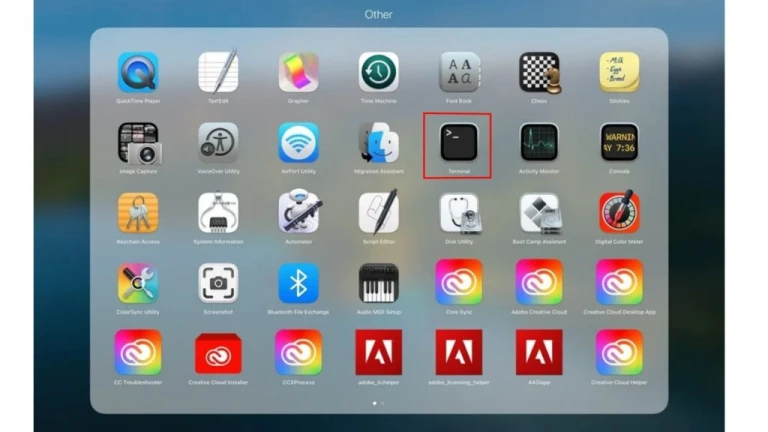
Step 1 – Open Terminal Commands
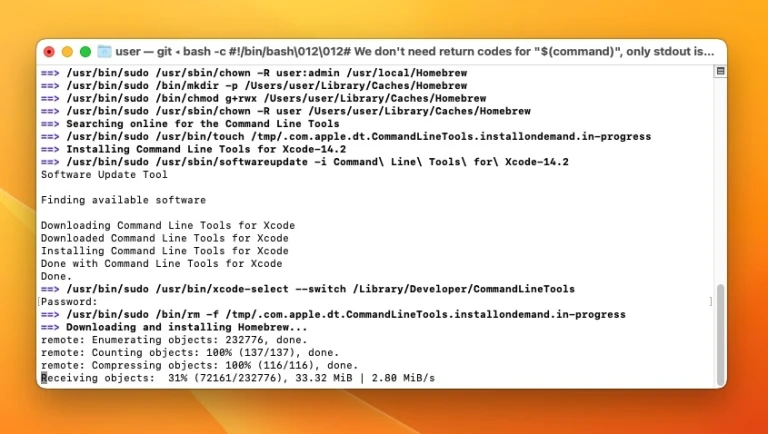
Step 2 – To install Homebrew, enter the following command. The following command is from Homebrew official website.
/bin/bash -c "$(curl -fsSL https://raw.githubusercontent.com/Homebrew/install/HEAD/install.sh)"Step 3 – Enter your password to complete the Installation (wait for the installation to complete)
Install Git and Anaconda
Step 1 – Open the terminal and enter the following command to install the Git Version Management tool.
brew install gitStep 2 – Then install Anaconda. It is more convenient to use Python on Anaconda to create a virtual environment.
brew install --cask anaconda
echo 'export PATH="/usr/local/anaconda3/bin:$PATH" ' >> ~/.zshrc
source  ~/.zshrc
conda init zsh
Step 3 – Create Virtual Environment for Python 3.10.6 by entering the following command on Terminal command. Press y to agree – It will download all the necessary packages.
conda create --name sdwebui python=3.10.62. Copy the Stable Diffusion WebUI repository
Step 1 – Copy the Stable Diffusion WebUI to your home directory
cd ~
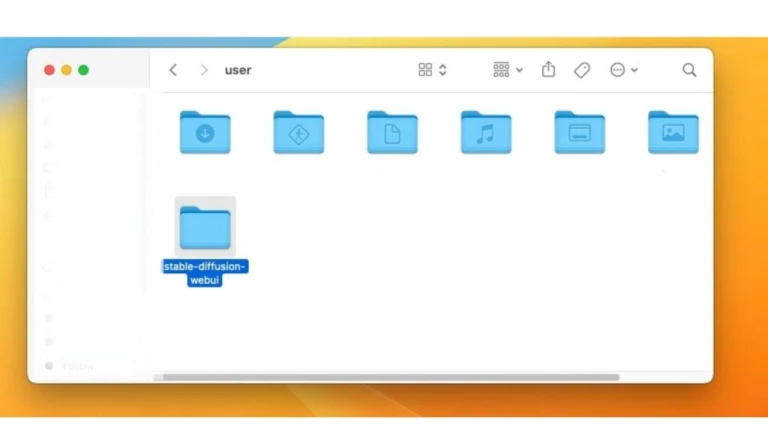
git clone https://github.com/AUTOMATIC1111/stable-diffusion-webui.gitStep 2 – Open Finder -→ Go to User → stable-diffusion-webui (it is the programme folder). Refer to the below image.
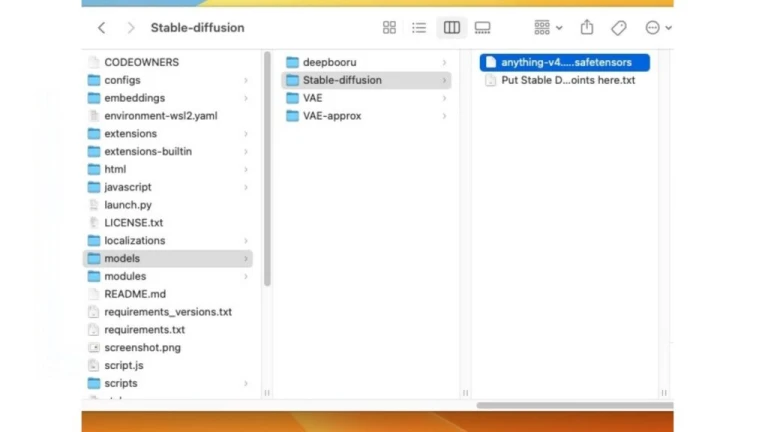
Step 3 – Move the downloaded model files to the stable-diffusion-webui/models/Stable-diffusion.
Step 4 – Comeback to the terminal → Start the python environment
conda activate sdwebui
3. Set the startup arguments
Find webui-user.sh file inside stable-diffusion-webui folder → Right click and open the file as word document or text file.
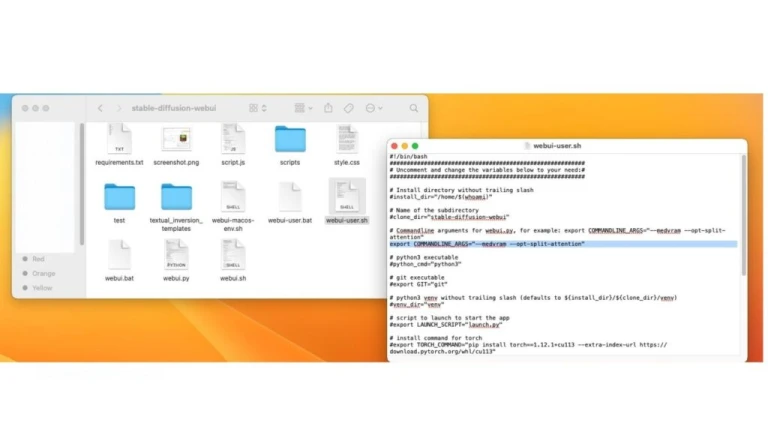
Refer to the highlighted section on the above image fill in – “export COMMANDLINE_ARGS=–medvram –opt-split-attention” the parameters, and reduce the usage of VRAM.
Further, Use –listen parameter to allow other computers to access the web interface with IP and –share to generate a set of Gradio URLs.
4. Run Stable Diffusion WebUI
Step 1 – Run webui.sh , it will automatically download the Pytorch. Also, it will install the necessary packages.
cd ~/stable-diffusion-webui

./webui.sh
Step 2 – It should then display a list of URLs as mentioned in the below image.

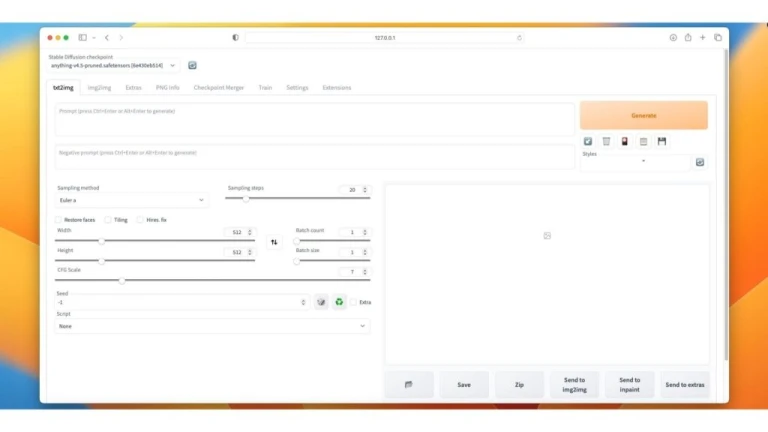
Step 3 – Open a browser and open the link – http://127.0.0.1:7860 and you will see the web Interface of the Stable Diffusion.
To close the SD WebUI you can right click on the terminal.
To run SD WebUI again in the future you can execute the following command on terminal.
conda activate sdwebui

cd ~/stable-diffusion-webui

./webui.sh
Read our article on “How to Install Stable Diffusion?“
How to Update Stable Diffusion WebUI (SD WebUI)?
Step 1 – Open the terminal in the Stable Diffusion WebUI directory → get the current branch, and a set of five codes will be written
git rev-parse –short HEAD
Step 2 – Then pull the latest branch and update it to the current version
git pull
Step 3 – If Merge branch ‘Master’ of – appears after the update, press Esc press the key and enter :q! to exit.
Step 4 – If any functions are not working properly, use the previous version of the SD WebUI.
git checkout "branch code"Hope you found this guide to instaal Stable Diffusion WebUI on macOS helpful. Let us know if you have any doubts regarding the installation process through our social media pages.
Contact us on Instagram, Twitter and Facebook.