How to Install Stable Diffusion (Nov 22)

For those who are frustrated with the convoluted process of installing Stable Diffusion on your local PC, here’s a quick but detailed guide to build and get SD 1.4 running on Windows. You can follow this same guide for 1.5 and beyond too.
A small hack to remove the nsfw filter is given at the bottom.
What Is Stable Diffusion?
Stable Diffusion is a text-to-image AI tool that can generate images from a given text prompt. It is released to public in late August 2022 as open source software and is free for general use. To get a quick sense of what it can do, try it out using the link below!
https://huggingface.co/spaces/stabilityai/stable-diffusion
Pretty amazing, yes? To get access to more tweaking options and make use of other trained datasets, you can install Stable Diffusion locally on your PC or laptop. Unfortunately there isn’t a one-click install option yet, and some non-technical people may find the current installation process slightly daunting.
No worries, we outline a quick guide below to help you install and setup Stable Diffusion on Windows.
Stable Diffusion GPU Requirements
Stable Diffusion can actually run on most laptops and PCs, without any special GPU requirements. However, without a modern GPU, it may take many minutes to generate each standard 512×512 image.
Currently Nvidia GPUs are better supported by Stable Diffusion compared to AMD GPUs. Something from Nvidia 10xx, 20xx series of graphics cards with 4GB of VRAM will do fine, and 30xx and 40xx with at least 8GB of VRAM will be ideal.
Steps to install Stable Diffusion on Windows
1. Install Anaconda / Miniconda
Anaconda is a bundle of software for Python and data science software developers. If you don’t already have this installed, then you can just install the stripped-down version called Miniconda3 from the official website below:
https://docs.conda.io/en/latest/miniconda.html
 Download the one in the red box
Download, and double-click to install Miniconda3, leaving all settings at the given defaults.
2. Install Git
Git is typically used by software programmers for managing their code. It is legit software and safe to install. Use the official link below
https://git-scm.com/download/win
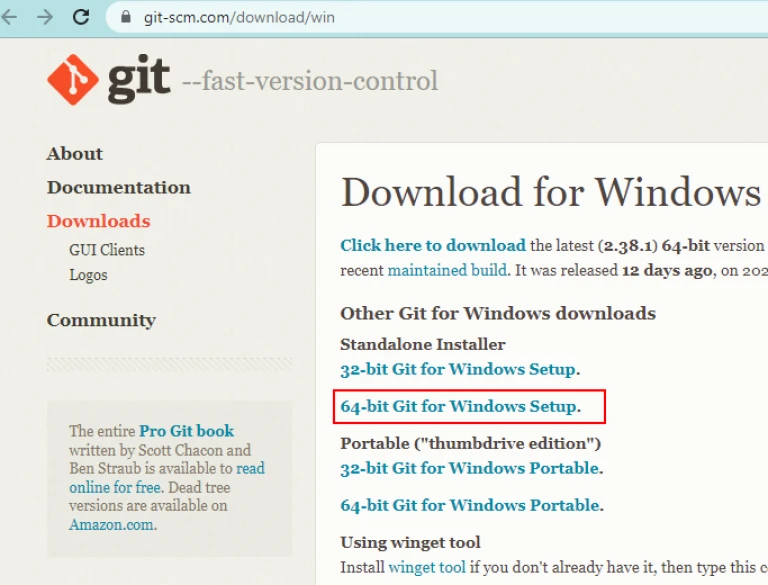 You probably want the version highlighted in red above.
Download and double-click to install Git, leaving all settings at the given default values.
3. Download Stable Diffusion
Go to the Stable Diffusion repository on Github:
https://github.com/CompVis/stable-diffusion
This is the main Stable Diffusion project page. Here you will be able to find and download the latest version of Stable Diffusion, with instructions to install, use, and hopefully installable binaries of Stable Diffusion in future.
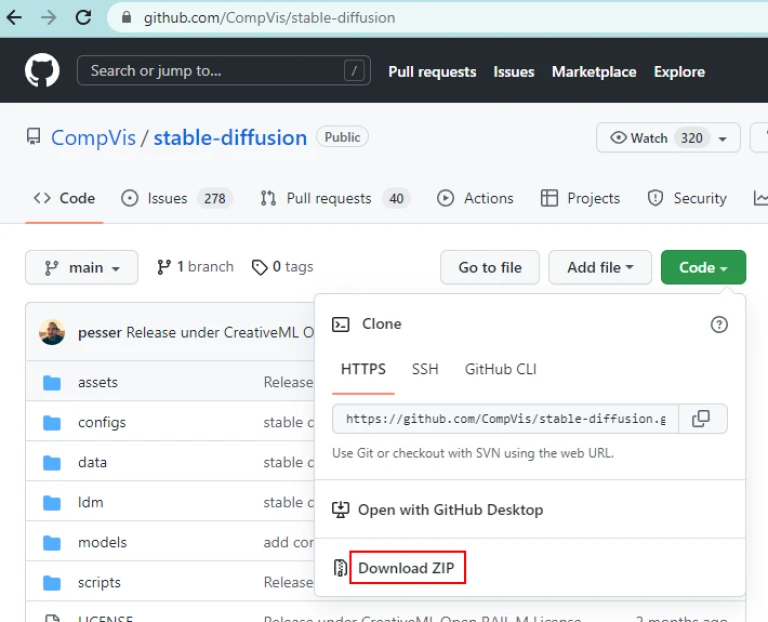 Click on the green “Code” button and download ZIP file
Click on the green “Code” button and download the ZIP file. Remember, you can always come back here to get the latest version of Stable Diffusion
Next, create a new folder, perhaps on your windows desktop and you can name it something like “my-SD”. Unzip the file into your newly created folder.
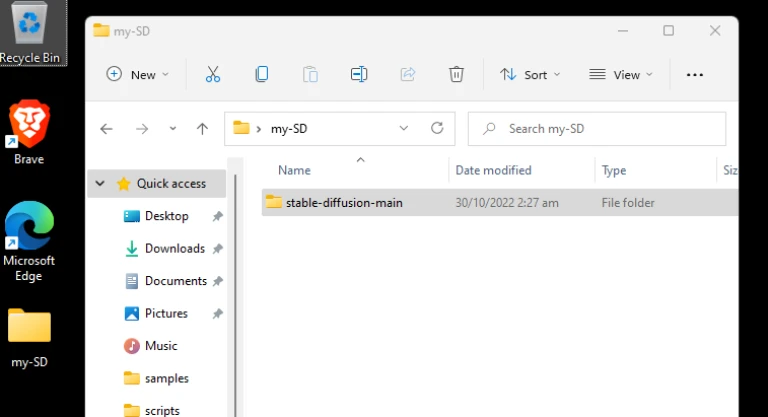 Unzip what you just downloaded into a new folder on your desktop
In future, you can unzip other versions or variants of Stable Diffusion into this folder.
4. Download a Stable Diffusion CheckPoint file
Stable Diffusion has been pre-trained on millions of images by the helpful community over at Huggingface.co. This deep learning and training process results in a checkpoint data file which Stable Diffusion will need to generate the images. Head over to:
Update: Get the v1.5 here https://huggingface.co/runwayml/stable-diffusion-v1-5
https://huggingface.co/CompVis
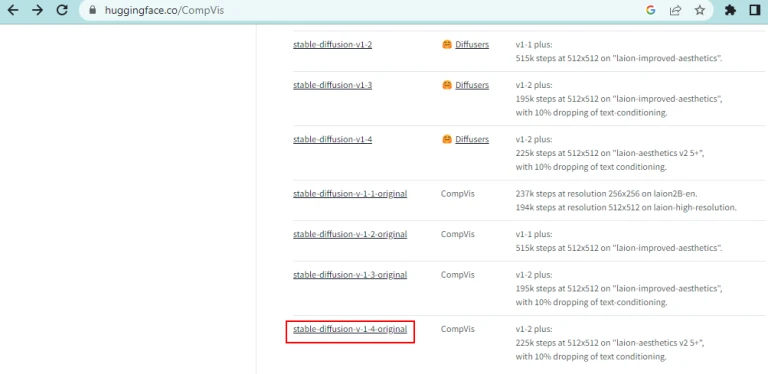 You can find the different versions here. Go with the latest.
Note that you’ll need to 1) create a free account, login and 2) agree to the license and terms of use before you can download checkpoint files.
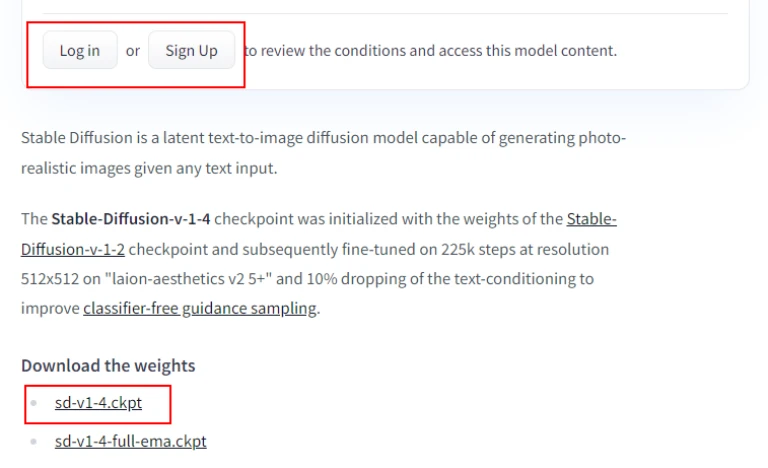 Pick the first ckpt file (about 4GB). Other is even bigger and useful for custom training.
The checkpoint files are pretty big, so it will take a while to download. It is helpful to know that you can download multiple checkpoint files, and using different ones with Stable Diffusion will give you different results, depending on how the AI training was done.
Now, go to the Stable Diffusion folder you unzipped, and create a new folder called “stable-diffusion-v1” inside the “models\ldm” subfolder as follows:
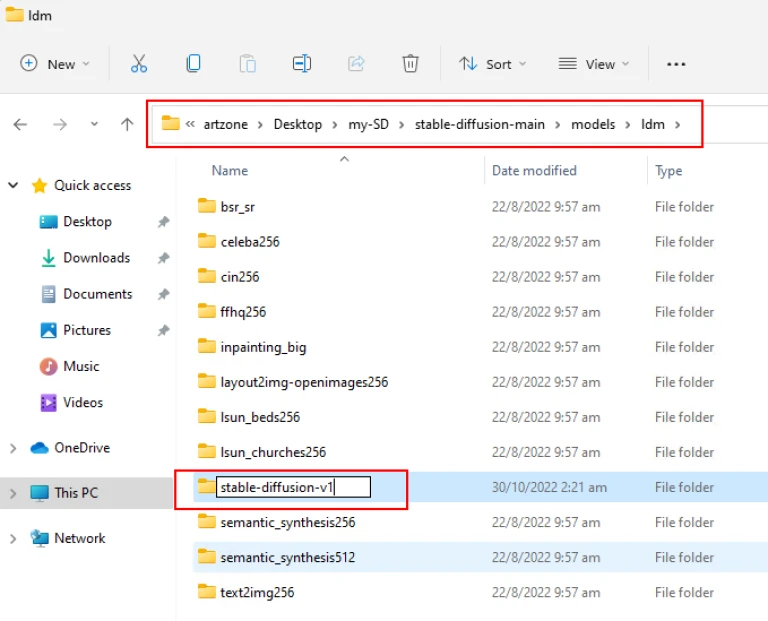 Name it exactly “stable-diffusino-v1” and put it in exactly there.
Next, move the downloaded checkpoint file (“sd-v1-4.ckpt” in this example) in there and rename it as “model.ckpt” to get as follows:
 Rename the downloaded ckpt file to model.ckpt and put inside “stabe-diffusion-v1” folder
Hint: If you do not want to rename the checkpoint file to “model.ckpt”, you will have to specify the path of to the checkpoint file you want to use, using the command line argument “–ckpt” (refer to instructions on SD github page in step 3)
5. Setup Stable Diffusion using Conda
Almost there. Now, you can follow the instructions given on the official Stable Diffusion Github page in step 3 to build Stable Diffusion on your computer.
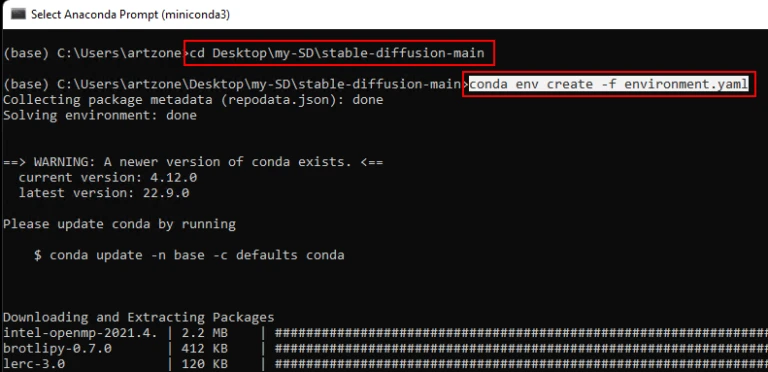
Start Anaconda Prompt (eg. use Windows Key and search for “Anaconda”). You will get a command shell interface. Go to your unzipped Stable Diffusion folder in step 3 (eg. by typing “cd Desktop\my-SD\stable-diffusion-main“).
Next, type in “conda env create -f environment.yaml” and Enter key. This will start a long, download and installation process (5-10mins?). Don’t interrupt and let the process finish.
 The miniconda3 prompt command line interface. Feel like a hacker yet?
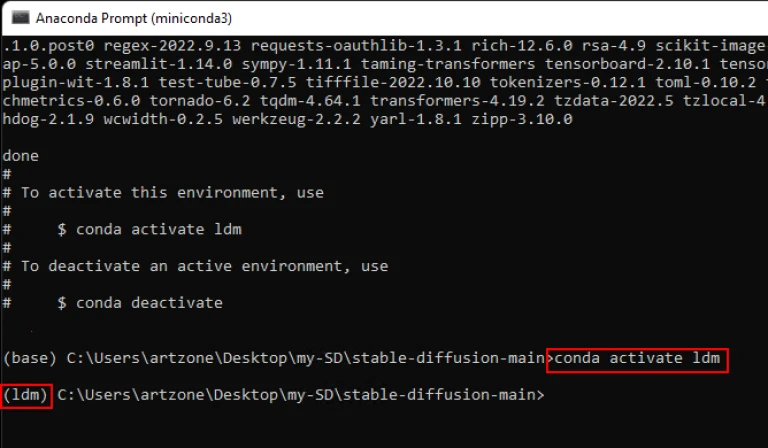
If all goes well, you have built Stable Diffusion on your local computer, congratulations!
Now type in “conda activate ldm“
You can try generating an image by typing as follows (in one line):
python scripts/txt2img.py --plms --n_iter 1 --n_samples 1 --prompt "Portrait of Elon Musk as Yoda by Edvard Munch" “Look like Yoda I do not.” – Ma Yi Long
Hint: If you want to build other variants of Stable Diffusion, you can follow the process as above. You may need to edit environment.yaml and change the name in first line to something else like ‘ldm2″. Then use “conda activate ldm2” and “conda deactivate” to switch out.
6. Try out different prompts!
To start using Stable Diffusion, you need to:
- Start Anaconda Prompt
- Go to your stable diffusion folder (“cd Desktop\my-SD\stable-diffusion-main”)
- Then type “conda activate ldm”
- Use the “python scripts/txt2img.py …..” with your own parameters and prompts!
Not sure what prompts you can use? Check out the excellent https://lexica.art/
How to Remove nsfw filter on Stable Diffusion
If you find yourself being Rick-Rolled by Stable Diffusion, it means that its built-in nsfw (not safe for work) filter has kicked in. Perhaps erroneously.
If you promise to be responsible and want to remove the nsfw filter, just edit the file “scripts\txt2img.py” (ie. open it in notepad). Look for the line “def check_safety” and comment out all the indented lines under it (put “#” in front) and add in a new line exactly as shown below:
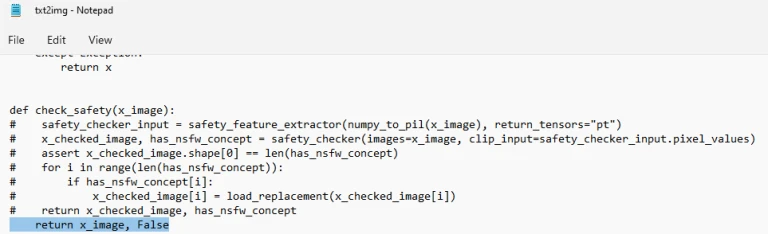 “you’re welcome”