How to Set Up Metamask for xDai NFT
Setting up your xDai wallet is incredibly straightforward
First, mobile users. If you’re using a web browser, scroll to the middle of the article.
We begin by setting up Metamask.
Mobile Users
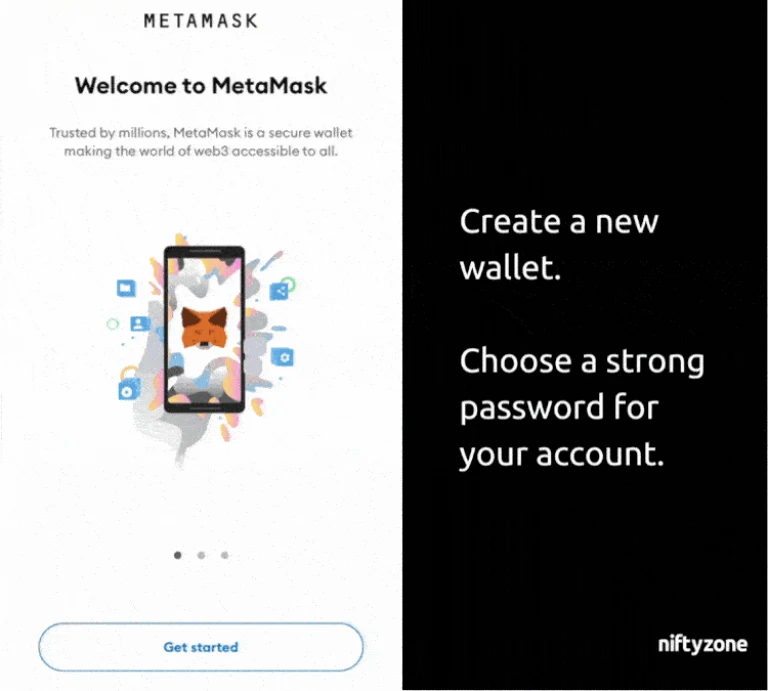
STEP 1 – Set up Metamask
Download the Metamask app from Google Play or the Apple Store.
Click on the Create a new wallet button, set up your account password (min 8 characters).
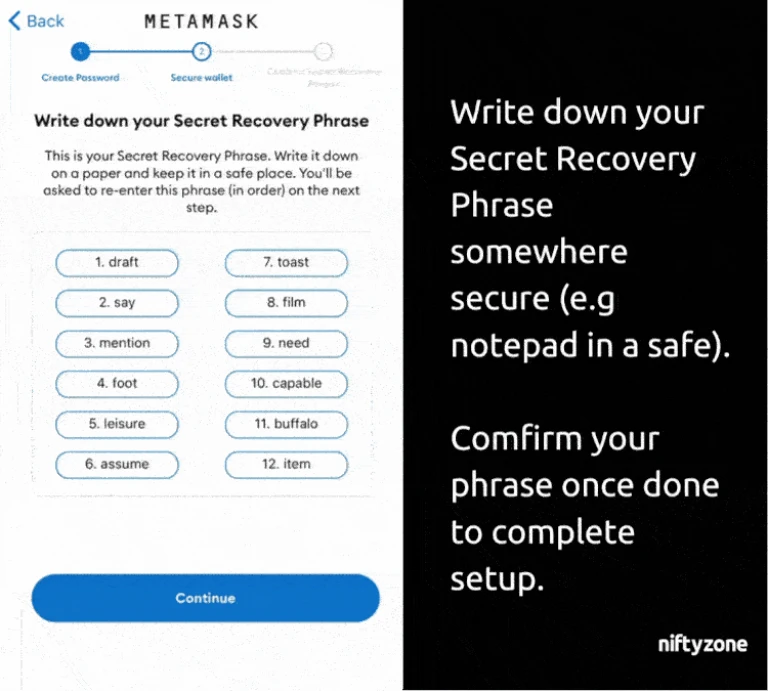
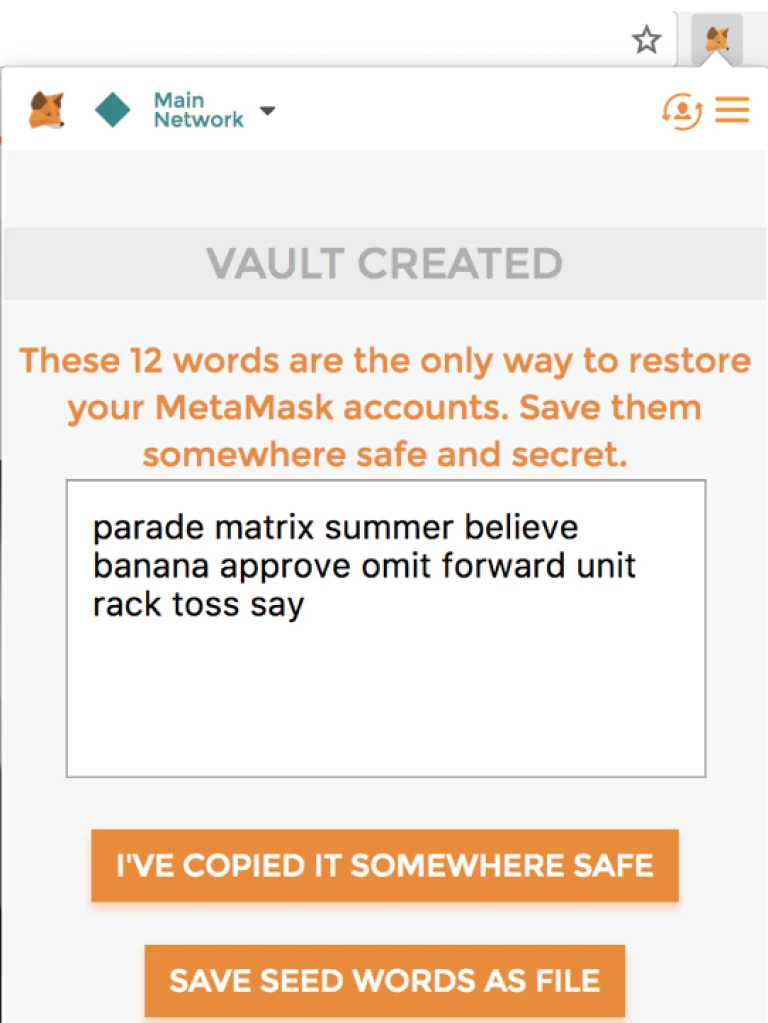
Next, Metamask will prepare to give you your Secret Recovery Phrase. These 12 words are the ONLY WAY to restore MetaMask accounts if you forget the password. You must store this phrase somewhere safe.
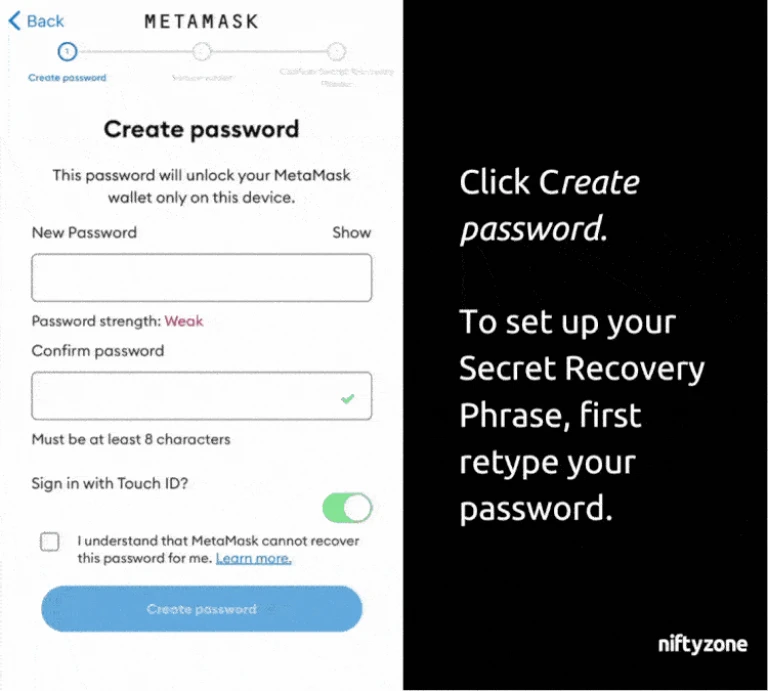
Record the Secret Recovery Phrase in a safe place such as in a notebook or USB key kept in a safe. After this security step, you can now access your wallet.
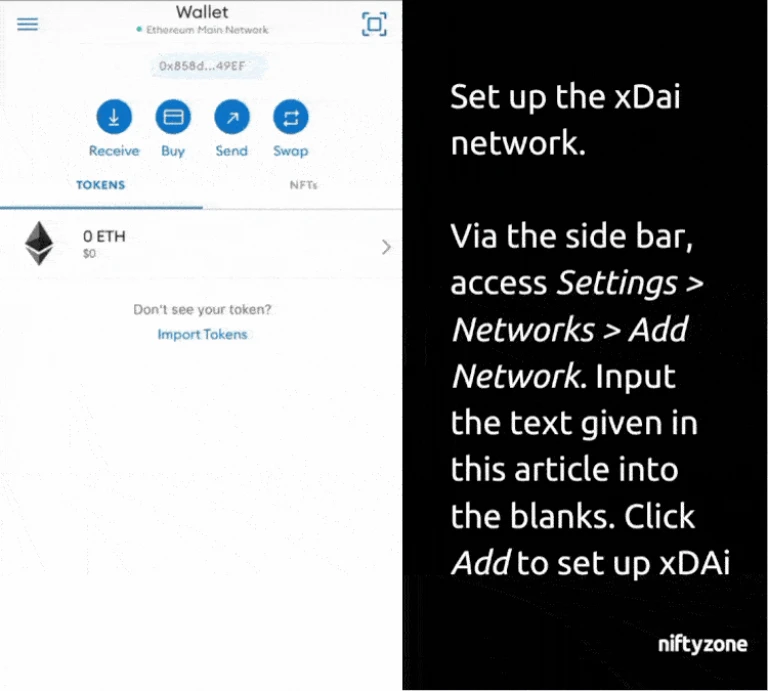
STEP 2 – Connect to xDai Network.
Access the sidebar using the drop-down menu in the upper left corner.
Click on the Settings option. Select Networks and click Add Network at the end of the screen.
Add a new RPC network by filling in these detail:
- Network Name: xDai
- New RPC URL: https://rpc.xdaichain.com/
- Chain ID: 0x64
- Symbol: xDai
- Block Explorer URL: https://blockscout.com/xdai/mainnet
Click Add when you’re done. This sets up the xDai network.
STEP 3 – Viewing your NFTs.
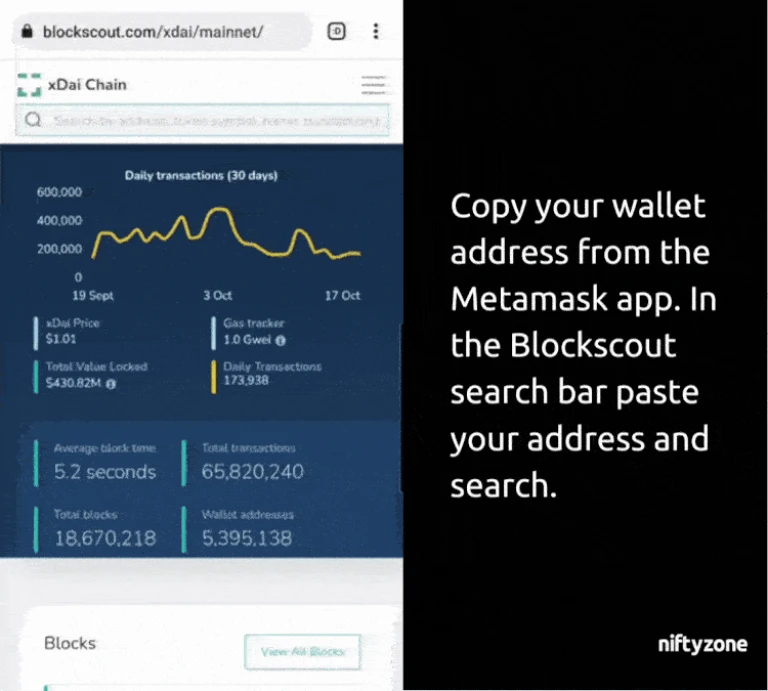
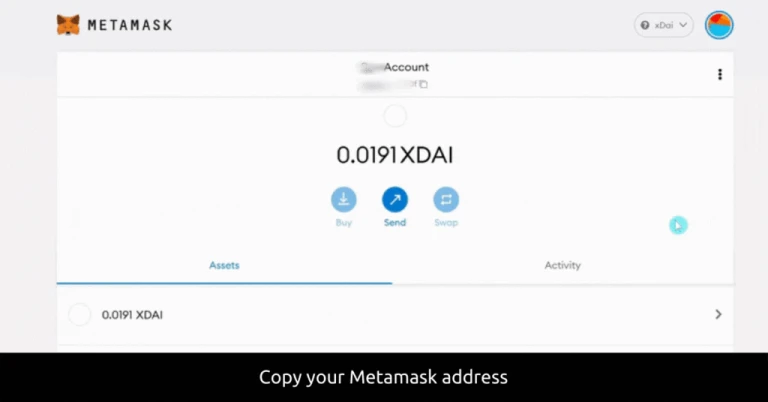
In the Metamask app, click on the address under your wallet name to copy it to your clipboard.
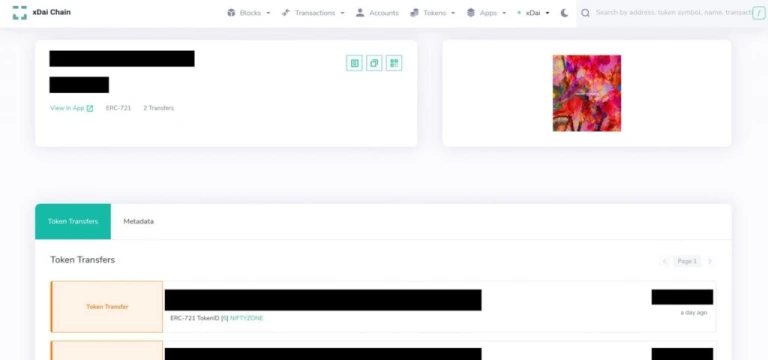
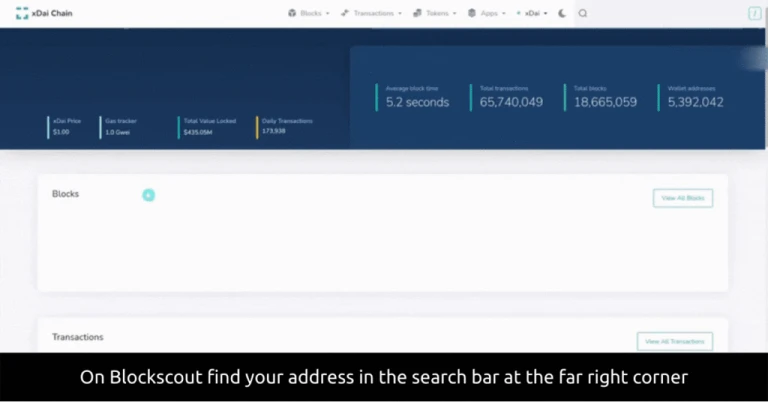
Next, open a new browser tab and go to this website: https://blockscout.com/xdai/mainnet/. Paste the address associated with your Metamask wallet into the search bar on the website
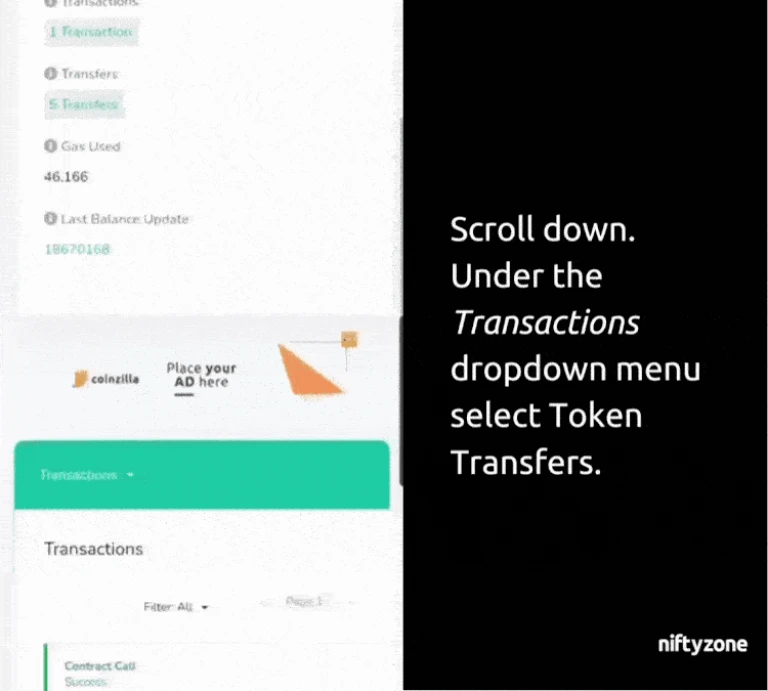
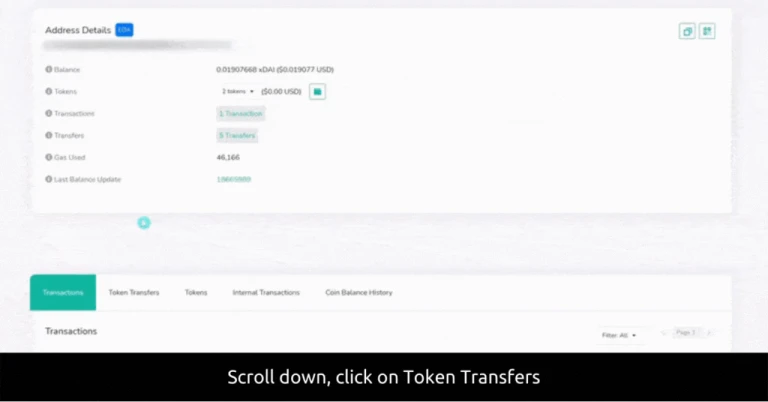
Scroll down the page. Click to expand the Transactions bar and click on Token Transfers.
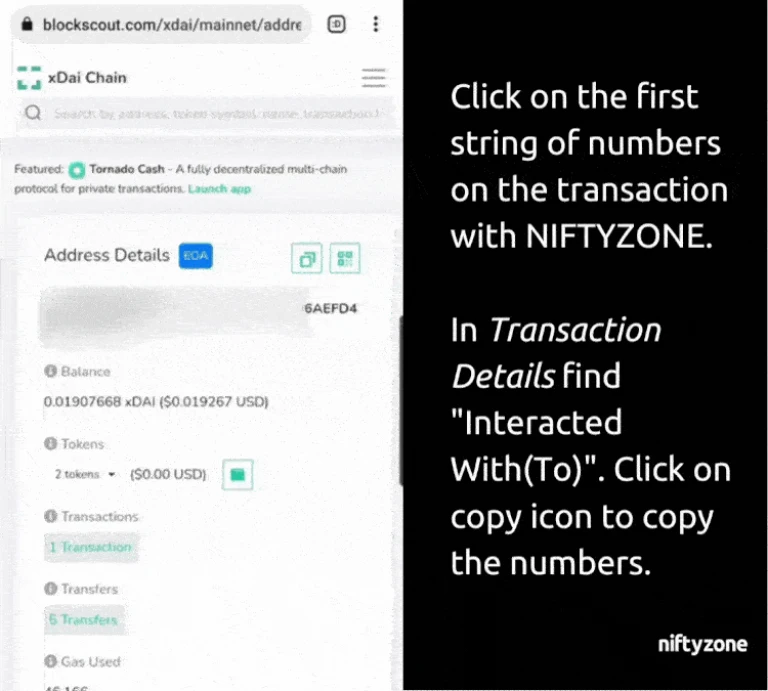
In each token transfer, click the first link below the name of the token transfer. This brings you to the “Transactions Details” page.
Under Interacted With click on the copy icon next to the string of numbers to copy them to your clipboard.
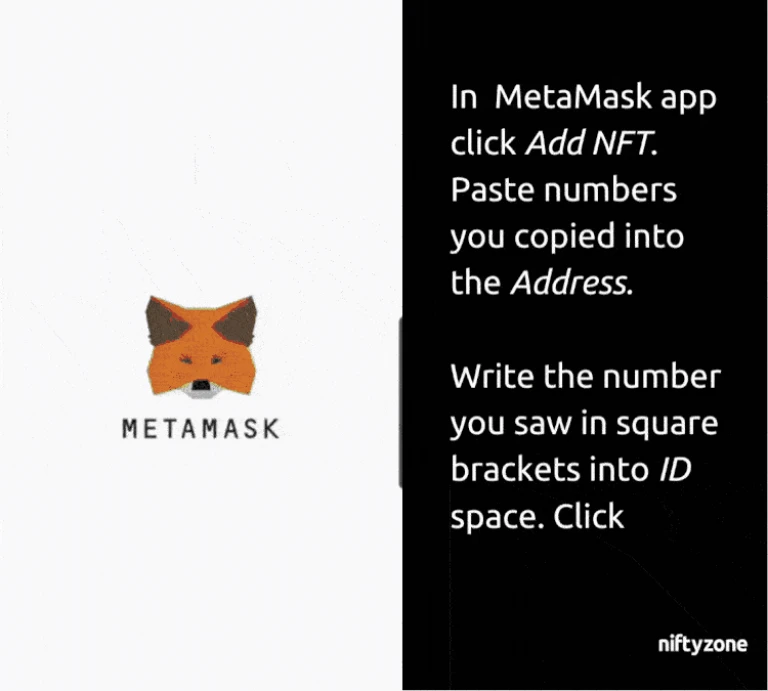
Finally, return to the MetaMask app and click on Add NFT. Paste the string of numbers you copied into the Address.
Then, write the number you saw within square brackets in the above step into the ID space. Click Import to add your NFT to your wallet and view it.
Congratulations you’re now able to see your NFT in your MetaMask wallet!
Web-browser Users
STEP 1 – Setting up Metamask
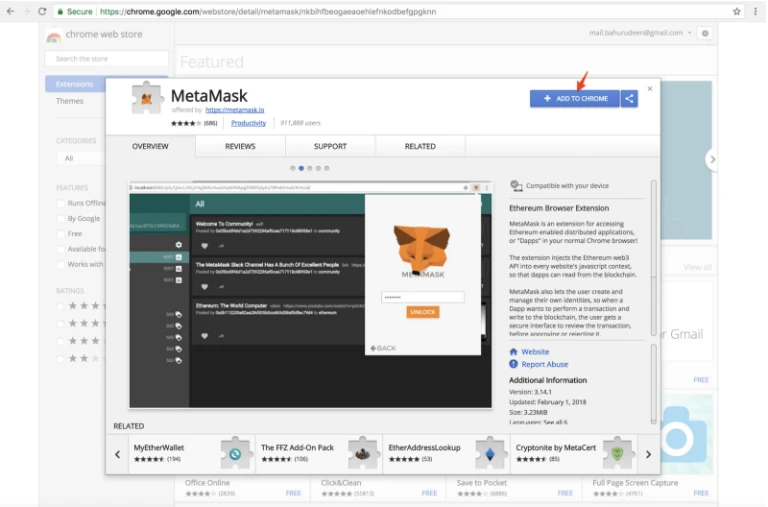
Open up a new Chrome browser window and navigate to https://chrome.google.com/webstore/detail/metamask/nkbihfbeogaeaoehlefnkodbefgpgknn and then click on ADD TO CHROME to install Metamask plugin.
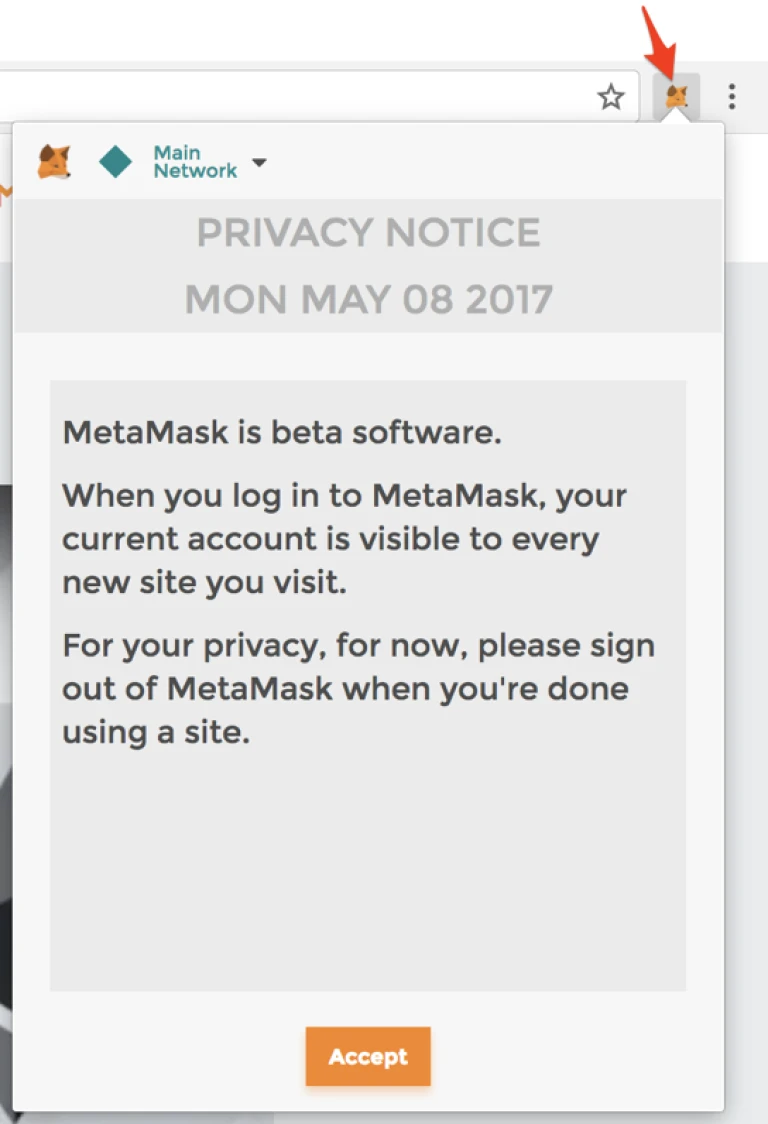
Once it’s been installed, click on the Metamask icon on the top right corner of the chrome browser. Accept to agree MetaMask’s terms of use.
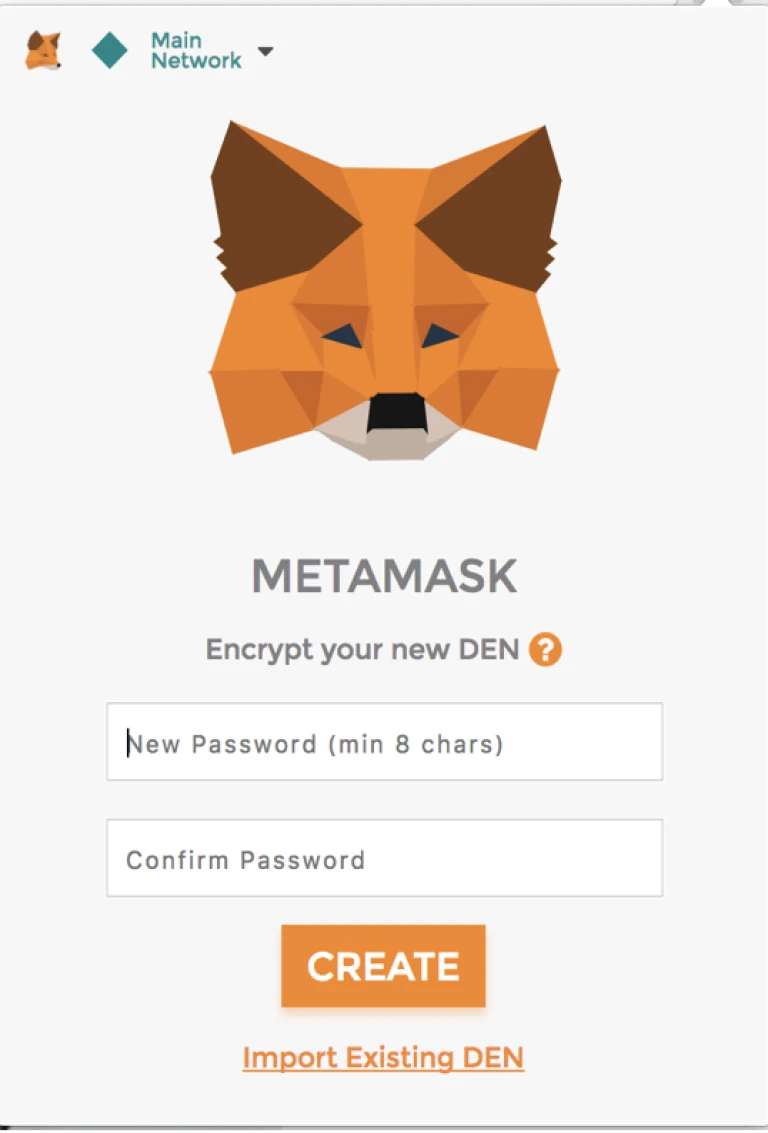
Enter the password you want to use and confirm it. Click Create for a new Ethereum account by default.
MetaMask will now show you a 12 word Secret Recovery Phrase. Store this somewhere safe.
Once you’ve stored your 12 words in a safe location click on I’VE COPIED IT SOMEWHERE SAFE. The main screen of MetaMask will open.
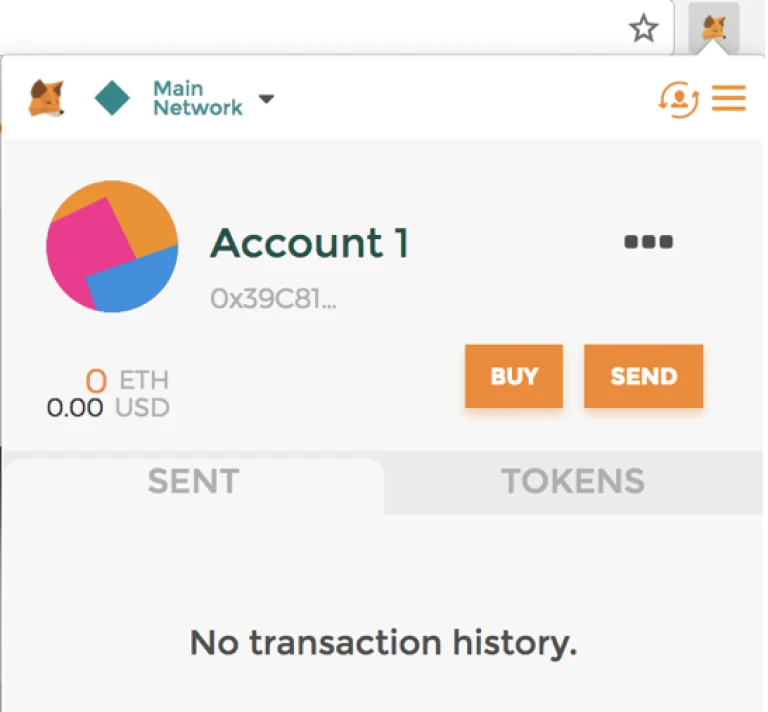
Your address can be found by clicking on the three little black dots and clicking Copy Address to clipboard.
STEP 2 – Connecting to the xDai network.
In Metamask, and select Custom RPC from the Network dropdown.
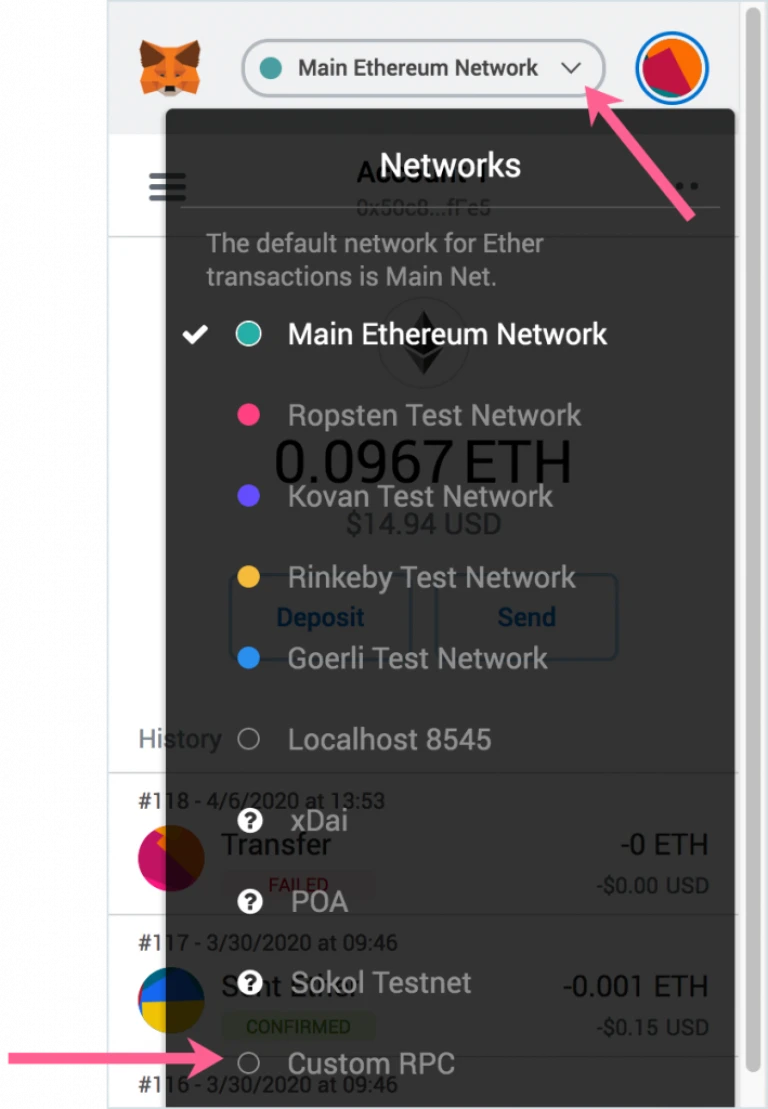
In the Custom RPC Settings, add in the xDai network details and click Save:
- Network Name: xDai
- New RPC URL: https://rpc.xdaichain.com/
- Chain ID: 0x64
- Symbol: xDai
- Block Explorer URL: https://blockscout.com/xdai/mainnet
STEP 3 – Viewing your NFTs
In the Metamask extension, click on the address under your wallet name to copy it. Open a new browser tab and go to this website: https://blockscout.com/xdai/mainnet/.
Paste your Metamask wallet address into the search bar on the website. You should be brought to a new page.
Click on Token Transfers tab toward the bottom of the page.
Scroll down and find the transfer performed by NIFTYZONE. Next to Token ID click the link attached to the number within the square brackets as shown: [ ]

You’ve found the page where you can see your NFT. Congratulations!