How to create AI art using Stable Diffusion?
What is Stable Diffusion?
Developed by company StabilityAI in 2022, Stable Diffusion is a text-to-image model using deep learning. It may also be used for other tasks including inpainting, outpainting, and producing image-to-image translations with the help of a text prompt. However, its main application is to produce detailed graphics based on text inputs.
How does Stable Diffusion Work?
Stable Diffusion creates Images according to the inputs provided by the users in a text prompt. You can choose the number of sampling steps, sampling method, width and height of the image and number of output images you want to create.
How to create AI Art using Stable Diffusion?
To start creating AI Art using Stable Diffusion, users must install the Stable diffusion first. Once they have set up their Stable Diffusion in their system, they can start creating high-quality ‘Text to Image’ or ‘Image to Image’ AI Art.
Once you have installed the Stable diffusion you can proceed to create AI Art. Follow the following steps to create your first AI Art using stable diffusion!!
Creating AI Arts using Text to Image method:
- Select the txt2img option.
- Enter the text prompt / instructions.
- Select Sampling Steps and Sampling method.
- Select Height and Width.
- Select batch size and batch count.
- Click on Generate.
- Regenerate for better output.
Let us go through these steps one by one and understand them in detail.
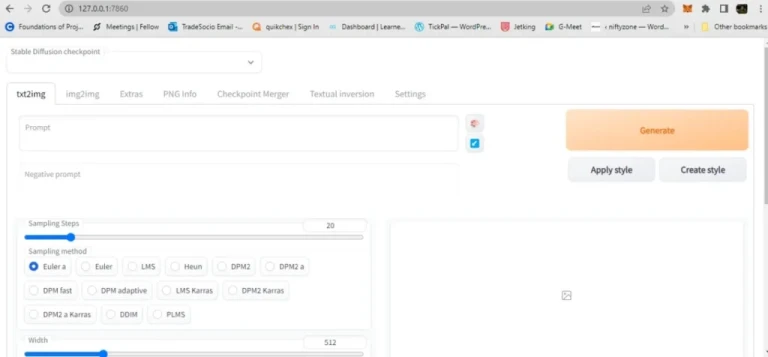
Step 1 – Select the txt2img option:
By selecting this option you can start creating AI Arts using pure texts. By default this option will be selected. However it is important to make sure that you have selected it.
This option will be available on top of the window as shown in the above screen shot.
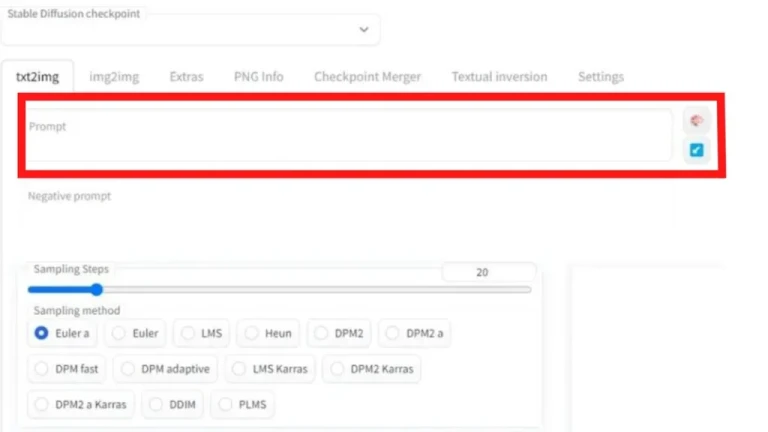
Step 2 – Enter the text prompt / instructions:
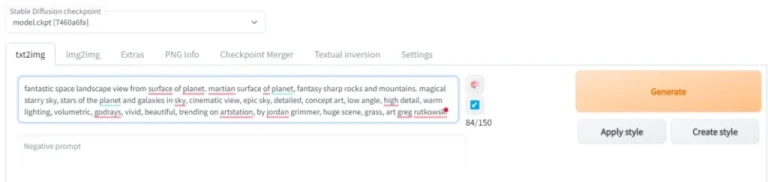
You can easily find text prompt space just under the txt2img option (Refer to the screenshot).
You need to enter your instructions to create AI Art. Entering a detailed prompt is important for getting your desired AI Art/image. You can specify a wide range of details such as realistic, Lighting of the image, image depth, macro photography etc.
Negative prompt:
Under the text prompt space you can find an option to fill negative prompt. So this option helps you to create the image as different as possible from the inputs you gave in the ‘Negative Prompt space’. So you can use this option to suggest what you dont expect in your AI Art.
Step 3 – Select Sampling steps and Sampling method:
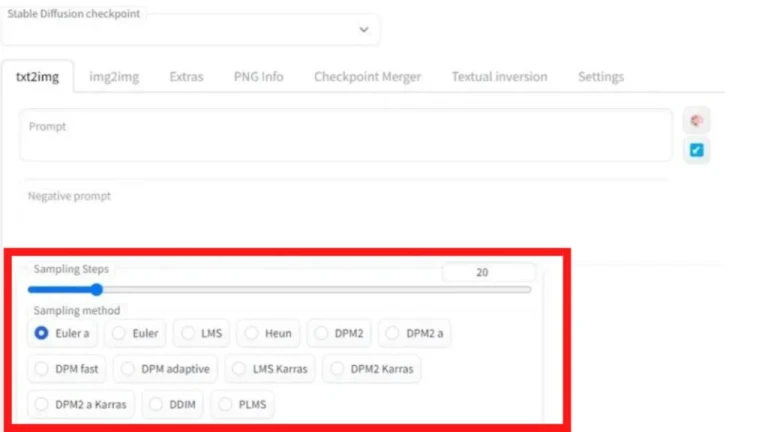
In this step you have to select Sampling steps and sampling methods for the image. There are a number of different sampling methods available to select from. For example Euler a, Euler, Lms, DPM Fast, DPM 2 etc. Each sampling method has its own method of creating AI Art.
The default number of sampling steps in Stable Diffusion is 20. However, you can select more number of sampling steps to increase the relevance of the output. But increasing sampling steps will also increase the load on your system.
It is important to know that different methods produce different qualities of images for different numbers of sampling steps.
Step 4 – Select Height and width:
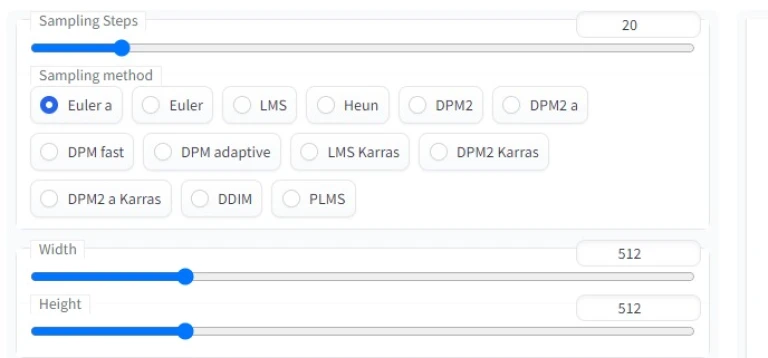
This is a simple procedure. Here you have to select the height and width of the image that you want to generate. Make sure to select your desired height and width. If you are creating the AI Art for your Instagram page you may want to select 1080px * 1080px. You can change the resolution according to your needs.
Also Read: Guide to Midjourney for AI Art
Step 5 – Select batch size and batch count.
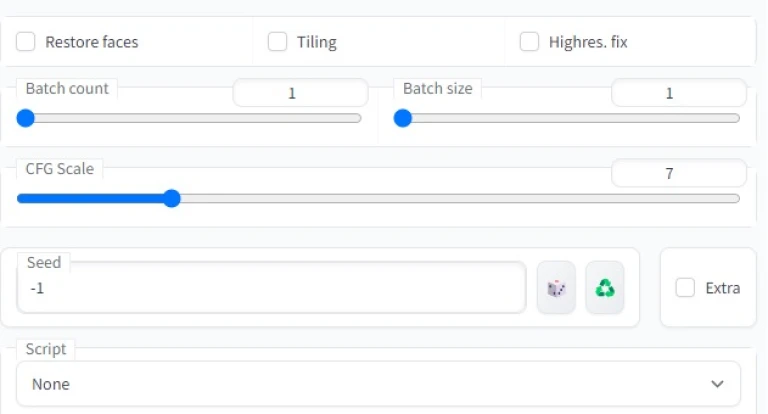
In this step select the number of outputs you want to produce. So, Batch count refers to no. of Images in grid format in a single image. Additionally, Batch Size refers to no. of such grid format images you want to produce.
So, Let’s say you want to create two 4*4 grid images. Then you have to select batch count as 4 and batch size as 2.
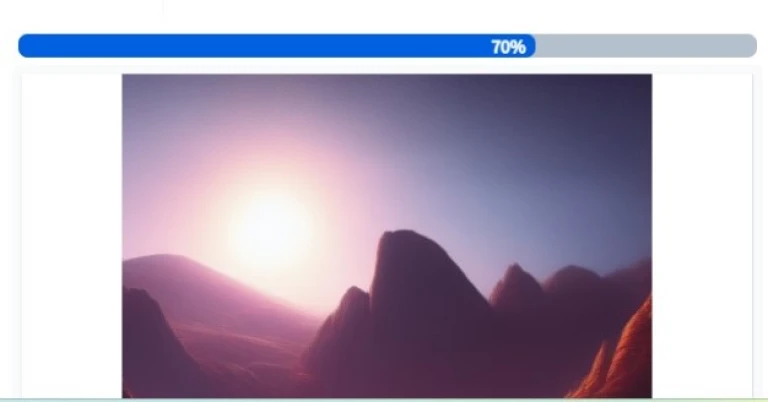
Step 6 – Click on Generate:
By clicking on generate, the AI will start generating AI art. It takes about 5 seconds to 30 seconds to create the AI Art. However, the waiting time will depend on the selections you make in the process.
Step 7 – Regenerate for better output:
Once you have generated the AI art/image you can regenerate them if you are not satisfied with the output. You can repeat steps 1 – 6 or edit them for better output. Once you have made the necessary changes you can click on the generate option to regenerate.
Thank you, please visit our Editorial to read more such interesting articles.
And also, read our article on Top Selling NFTs by Indian Artists.
Also, follow us on Twitter and Instagram to participate in Niftyzone NFT Giveaways.