How to generate QR codes that are merged with AI art?
We have all made use of QR codes (Quick Response) in one or the other place. We can say that It’s the highest scanned variant which was invented to replace barcodes. From getting information on the smallest of things to sharing data to making payments online, practically we can do everything using QR codes.
In recent years, everyone is using it extensively, more than anything because it is an efficient way for the mode of payment, ranging from a small pop-up store to a shopping mall.
But the one thing that’s familiar is the way it looks. The visual part, all QR codes look the same to us and although that’s not an issue, there is always room for creative possibilities and now we have a new one. Imagine merging any AI-generated image into a QR code and making the code look like an image along with functionality. This would be a game-changer for Advertisement industries.
So, let’s check this new method of how to generate QR codes with embedded AI art.
How to merge QR codes with AI generated art?
We can make use of Stable diffusion, A Text based AI image generation model. Although it’s free for everyone to use, your PC must have few hardware requirements in order to run this. It has multiple options in it and one such is img2mg, which helps you to create one image in the beginning and can make use of that as your starting point and then enhance it further.
There is another model called ControlNet which is a neural network model used in Stable Diffusion. txt2img is a basic form that utilizes a text prompt as conditioning to generate images. Since ControlNet specializes in edge detection and human poses, it comes in with another conditioning upo the basic one.
Let’s start creating the QR codes that is merged with AI-generated art.
A simple online search for a “QR code generator” can lead you to countless options to create the initial design.However, to ensure the successful merging of the QR code into the image, we need to create one with a high correction level. The correction level of a QR code, or its fault tolerance, indicates the extent to which it can sustain damage while still remaining readable.
First step is to download any basic QR codes. But we need to keep in mind that we will be merging an image within the QR, so we need to keep in mind about the fault tolerance.
Fault tolerance is simply the measure of the amount of destruction that a QR code can withstand while still performing its intended function.
Requirements for QR code
Follow these steps to get a seamless output at the end and it begins with the creation of QR which holds:
- High fault tolerance setting – 30%
- To have white a white margin around the QR
- Use the basic square fill with a black and white.
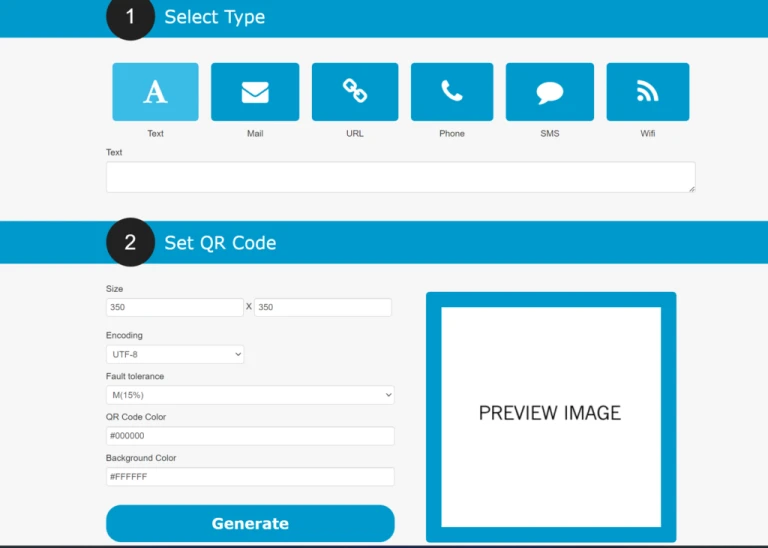
We have used QR Code Generator over here to get our QR code.
How to run Stable Diffusion?
We can run Stable Diffusion in 2 different methods,
If you want to run Stable Diffusion on a PC, you will need to download and install a web interface called AUTOMATIC1111.
Follow the steps below to install Stable Diffusion:
- Start by installing Python 3.11 from the Microsoft Store.
- Open Command Prompt on your PC and type “python” and press enter
The command prompt will show the version of Python and the time installed.
- Download and install git, a code repository management tool.
- Then, open Command prompt and enter the following: cd %userprofile%
It will come to Windows user folder.
- Now, clone the Stable Diffusion web repository by running this command in Command prompt
Prompt: git clone https://github.com/AUTOMATIC1111/stable-diffusion-webui.git
This will install Stable Diffusion on your Windows system. However, to run the web UI, you must download a Stable Diffusion checkpoint.
Find the installation folder by entering: “%userprofile%stable-diffusion-webui” into the address bar in the windows explorer..
Now, download the Stable Diffusion v1.5 as the base checkpoint file. Similarly, download other models like Realistic Vision 2.0 and ReVAnimated and place them in the above folder.
Using Windows File Explorer, locate the file titled “webui-user.bat” to complete the installation.
Click the file once again to run Stable Diffusion web UI on your Windows PC. Open a web browser and paste the listed “local URL” into it.
Source: youtubeRead on How to install Stable Diffusion WebUI on MAC OS.
Check for Updates
Once you open the Stable Diffusion Web UI, you will see a simple interface for creating AI images. Before creating images, there is one last but essential step – installing ControlNet.
To start, click “Extensions” on the Stable Diffusion web UI.
In the text box, paste the URL http://github.com/Mikubill/sd-webui-controlnet and click “Install.”
Please ensure that you have selected all the entries in the table, and then click on “Installed” under the Extension option
Then, click “Check for updates” to ensure all files are up to date, and click “Apply and restart UI.”
ControlNet models must now be downloaded separately. These files are crucial for accurately tracing the QR code image and dots, so they should not be overlooked.
Once the files are downloaded, copy and paste them in the following location: stable-diffusion-webui > Extensions > sd-webui-controlnet > models.
Reference: stable-diffusion-webUI is the folder we created earlier.
With all the resources in place, you can begin using ControlNet inside Stable Diffusion.
Time for AI image generation
Generate an image using the “txt2img” model.
Using a checkpoint model of your choice and “DPM++ 2M a Karras” as the sampling method, save your image.
Go to “img2img” section and enter the same text prompt as earlier and upload the image. Set the final image dimensions, choose the same sampling method as above, and set the “Denoising strength” to approximately 60%.
Next, In the “ControlNet” tab, check “Enable”. If you don’t have a dedicated graphics card or it has less than 8GB of video RAM on it’s GPU, then check for “Low VRAM” option to go with.
Upload the same image in “ControlNet” and choose a Control Type.
Upload the QR code again in second ControlNet panel and select the “Tile” Control Type. Set the “Control Weight” to 1.2, the “Starting Control Step” to 0.25, and the “Ending Control Step” to 0.75 as the starting points.
Click Generate to get the image.
You might have to tweak the Denoising strength and the ControlNet parameters before reaching the desired result. It may be a long and frustrating process, and it can be challenging to get perfect results, so brace yourself and keep trying.
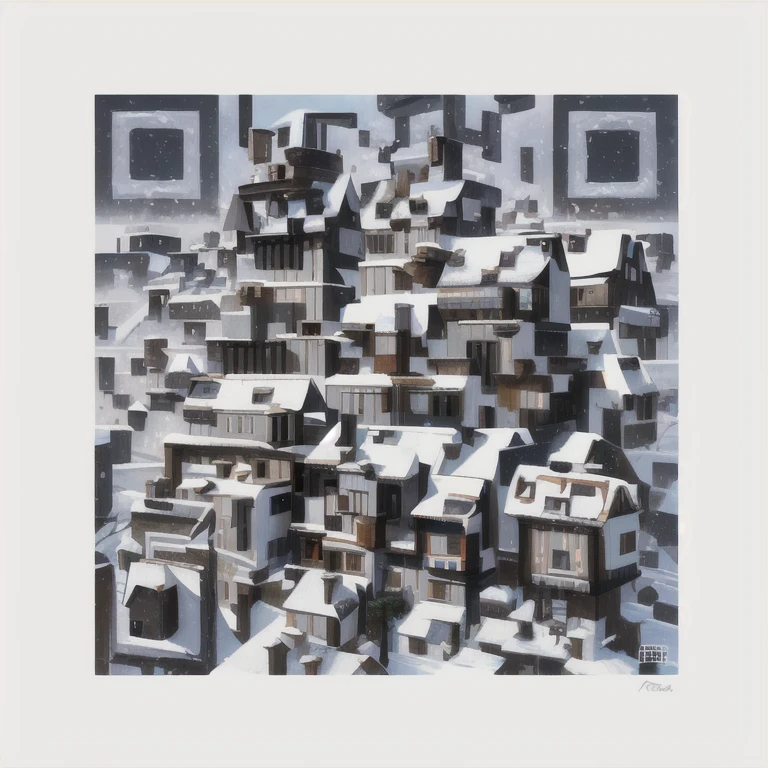
Work on different values of Denoising strength, ControlNet parameters and other changeable values before getting the optimum result. Although it’s a lengthy and challenging process, you will get a better and desirable output. just keep tweaking.