Beginner’s Guide to Inpainting in Stable Diffusion AI
It is uncommon to get the ideal image in one shot, regardless of how wonderful your prompt and model are.
Inpainting is also a crucial technique for repairing minor flaws. We’ll go over a few simple examples of how to utilize inpainting to remedy flaws in this post!
You might want to read the beginner’s guide first if you are new to Stable Diffusion AI!
Basic Inpainting Settings
In this session, we’ll walk you through the process of using inpainting to correct minor flaws.
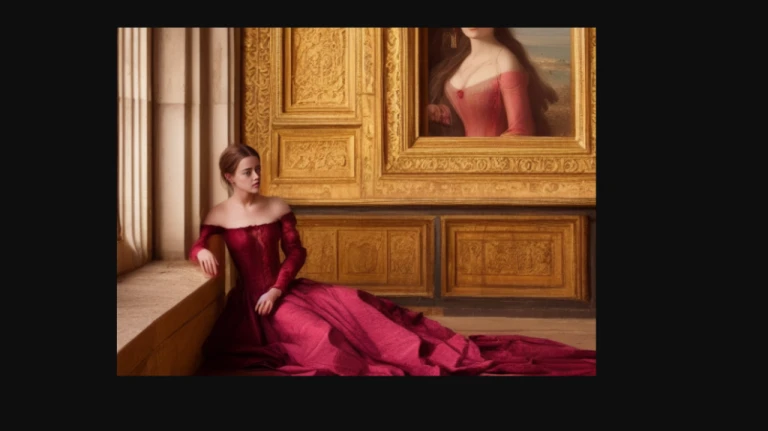
We’ll make use of a unique picture from the Lonely Palace prompt:
[emma watson: amber heard: 0.5], (long hair:0.5), headLeaf, wearing stola, vast roman palace, large window, medieval renaissance palace, ((large room)), 4k, arstation, intricate, elegant, highly detailed
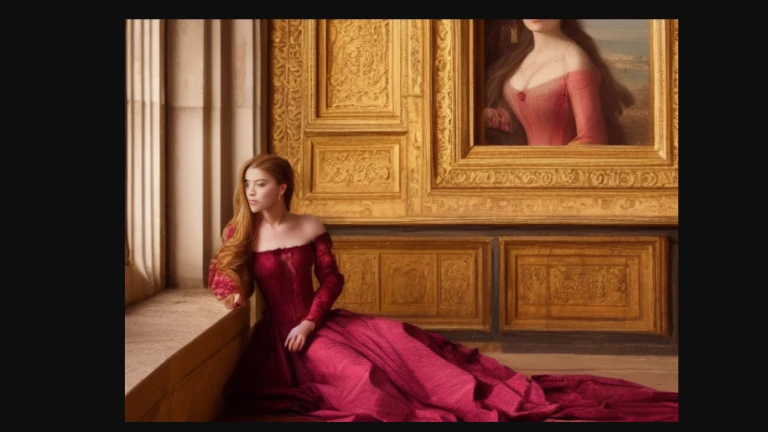 Original Image
It’s a good image, however there are a few things we would like to change:
- The face seems out of place.
- There is no right arm.
Use an Inpainting Model (Optional)
Are you aware that stable diffusion models have been specifically specialised for inpainting? If you want the best outcome, you can use it. However, most of the time it’s okay to inpaint using the same model that created the image.
Download the model checkpoint file and place it in the folder to instal the v1.5 inpainting model.
Press the refresh symbol in AUTOMATIC1111 next to the checkpoint selection dropdown in the upper left corner. To enable the model, choose sd-v1-5-inpainting.ckpt.
Creating an Inpainting Mask
 Inpainting
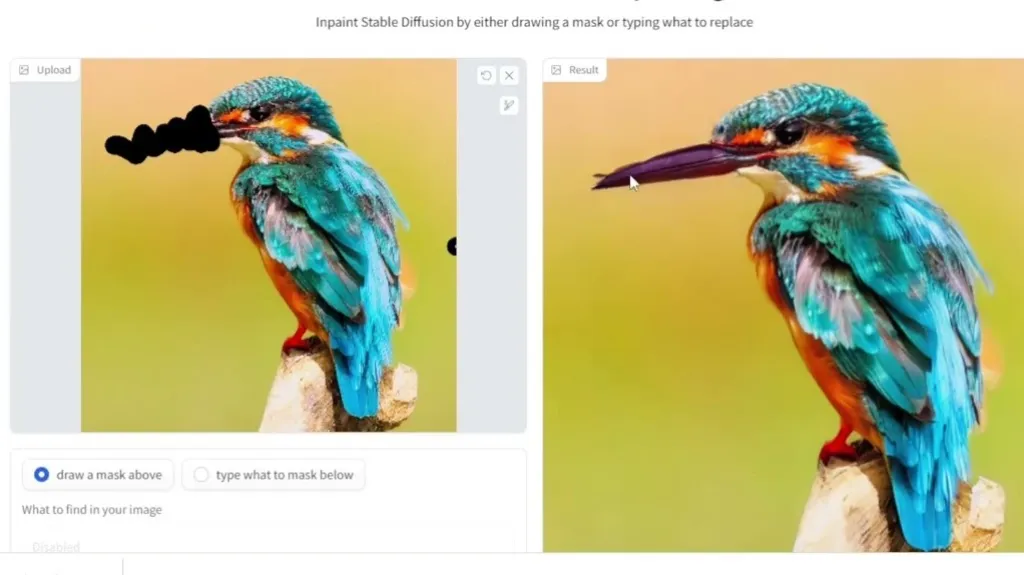
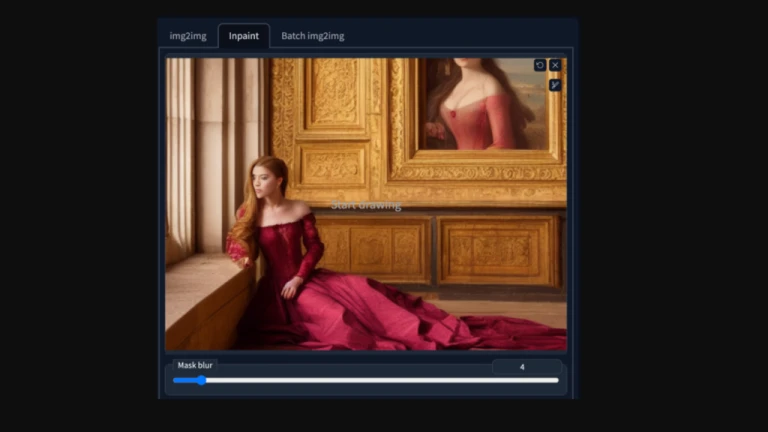
Select the img2img tab and the Inpaint sub-tab in the AUTOMATIC1111 GUI. Upload the picture to the canvas for inpainting.
The right arm and face will be painted at the same time. Making a mask that will be inpainted using the paintbrush tool. You want Stable Diffusion to regenerate in this region.
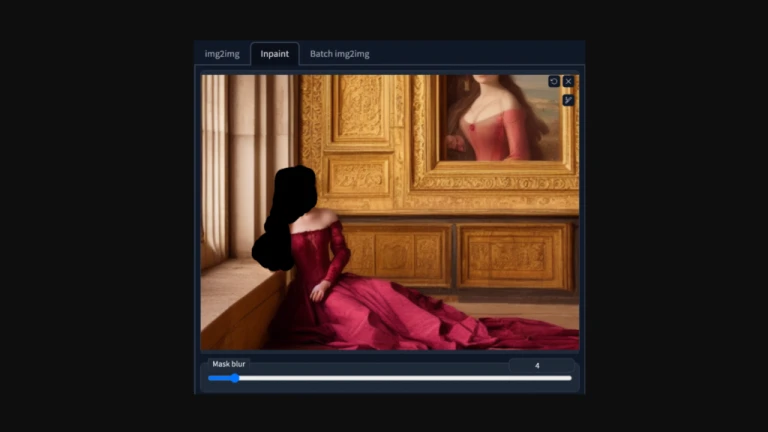 Create a mask by using the paintbrush tool.
Settings for Inpainting
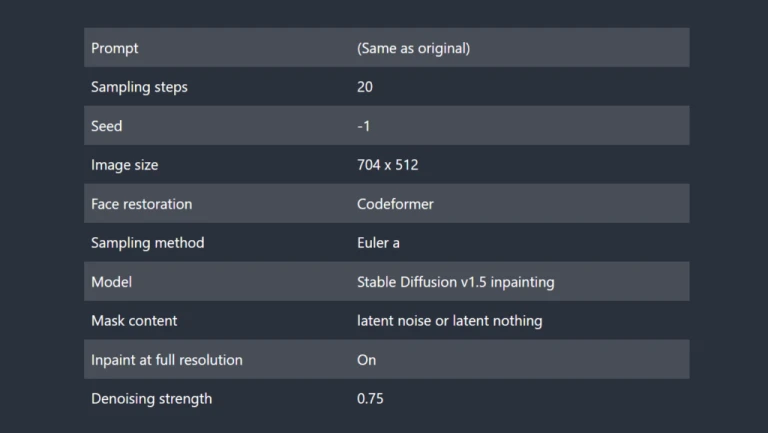
Prompt
The original prompt can be used again to correct flaws. Similar to creating several photos, but with the ability to choose a specific area and with various options.
Image Size
The image size must be changed to match the original image size. In this instance, 704 x 512.
Face Restoration
Make sure to activate restore faces if you’re inpainting faces. (In the Settings page, you must also choose and use the face restoration model that will be used. A nice one is CodeFormer.)
Inpainting in Full Resolution
Selecting inpaint in full resolution is crucial when painting a small area with precise details. Your masked area would increase, be inpainted, and then be scaled back down if you did this. The outcome is an inpainting with more minute elements.
Mask Content
Mask Content is the next crucial setting.
If you want the outcome to be influenced by the colour and shape of the original content, choose original. Since the general shape and structure of faces were acceptable, original is used when inpainting them. Additionally, we simply want a slight change in appearance.
Latent noise and latent nothing should be chosen if you wish to regenerate something that is entirely different from the original, such eliminating a limb or hiding a hand. These choices also replace the original image as the initial value for the masked region. Thus, it will result in a very different outcome.
Denoising Strength
Denoising strength controls how much changes it will make compared with the original image. Nothing will change when you set it to 0. You will get an unrelated inpainting when you set it to 1.
0.4 is usually a good starting point. Increase if you want more changes.
Batch Size
Make sure to generate a few images at a time so that you can choose the best ones. Set the seed to -1 so that every image is different.
 Batch Size
The Results
 Results of Inpainting
Follow us on Instagram: @artzoneai