How to Claim, Access and Transfer NFTs from your ArtZone wallet
How to log in to Particle network wallet using social media?
Using social media to login to your own particle wallet is a seamless and easy process. Follow the simple step by step guide below:
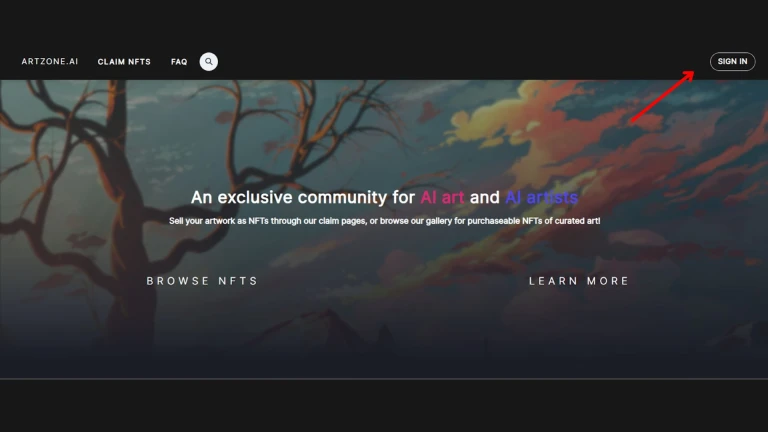
Step1: Click on Sign in
Step 2: Click on the login options available under “Connect a Wallet”. Choose social media you would like. We will be using discord for the tutorial.
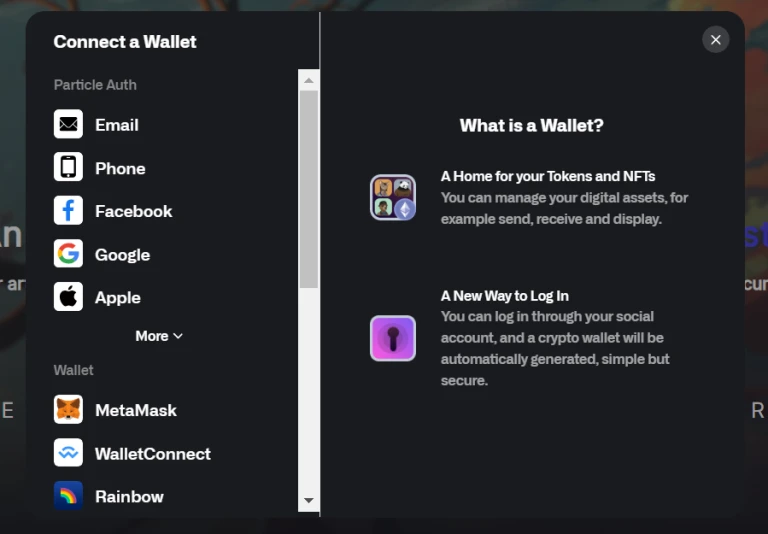
Step 3: Click on Discord - This should open a discord’s authentication window via your discord account.
Step 4: Authorize your login using discord. That's all, you have been logged in to your Particle wallet!
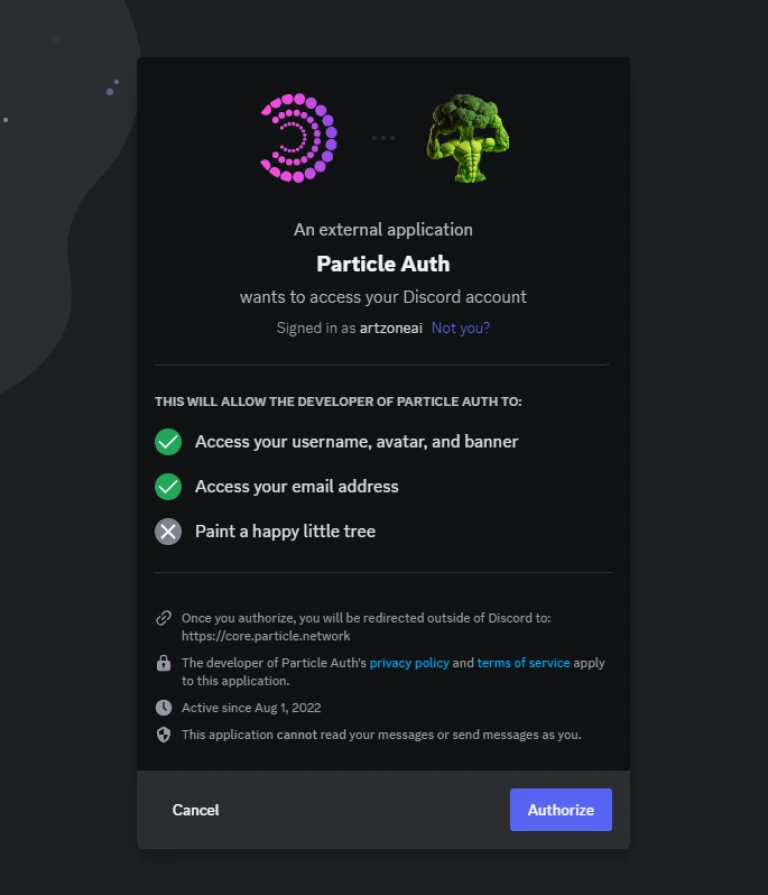
If you wish to use facebook or any other social media platform for the process, you just have to repeat the authentication process.
How to login to Particle network using phone number or Email address?
Like social media login methods, using a phone number or email id to log in is pretty straightforward and simple. Following are the easy steps involved:
Step 1: Click on Sign in
Step 2: Click on ‘Phone’ or ‘Email’. By clicking this you will open a menu to select your country code and a space to enter your Phone number. Carefully select your country code and enter your mobile number.
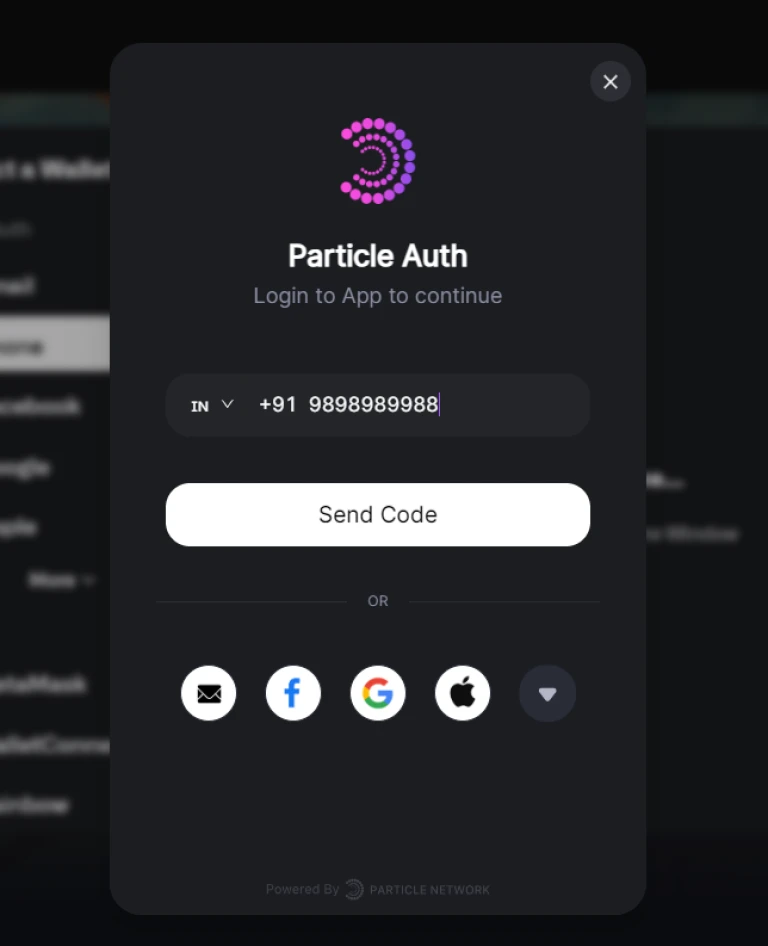
If you are using the email id to login, all you have to do is enter your email address.
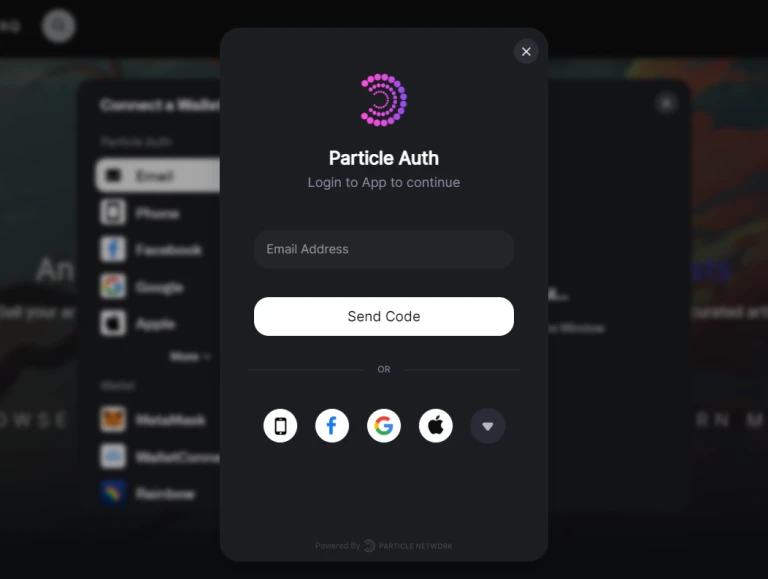
Step 3: Press send code. Once you have entered your phone no. or email id press on send code to initiate sending a confirmation code for login.
Step 4: Enter your 6 digit confirmation code. Check your inbox for the confirmation code from ‘Particle Network’ and enter the confirmation code to complete the login process.
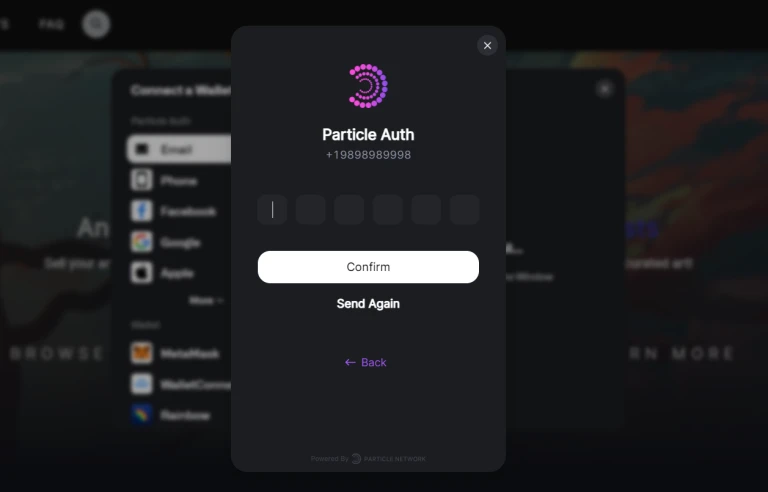
That’s all. Now you are logged in to your particle wallet using phone no. or email id. However if you still face any issue while logging in, please contact us on our social media pages or write to us support@artzone.ai .
How to Claim Free NFTs on Artzone?
Navigate to the Artzone NFT Platform: Start by opening the Artzone NFT page. Look for the "Claim NFT" option located in the top right corner of the webpage and click on it.
Access the Claim NFT Page: Once you've clicked on the "Claim NFT" button, you will be redirected to a page showcasing various NFTs available for claiming. Here, you will find a mix of free and purchasable NFTs.
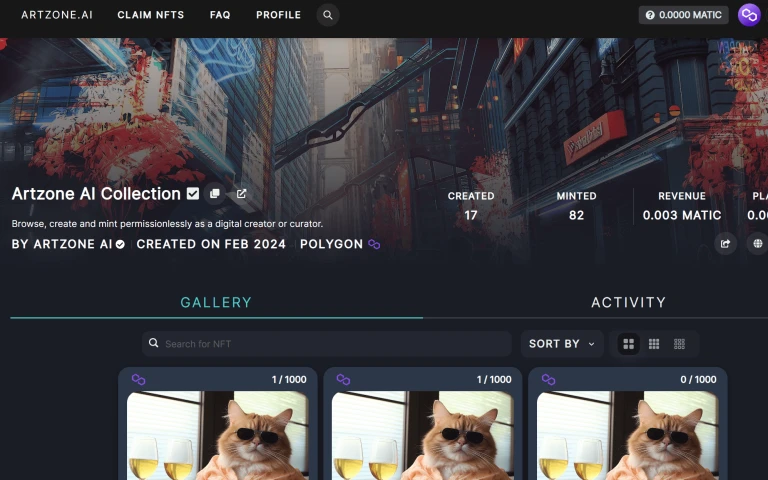
Select a Free NFT: For the purpose of this demonstration, we will focus on claiming a free NFT. Browse through the selection and identify the NFTs marked as free.
Claim Your Chosen NFT: Click on one of the free NFTs to view its details. On the NFT's individual page, you will notice a "Claim Now" button. Right above this button, the available quantity of this specific NFT that you can claim is displayed, typically ranging from 1 to 5 units.
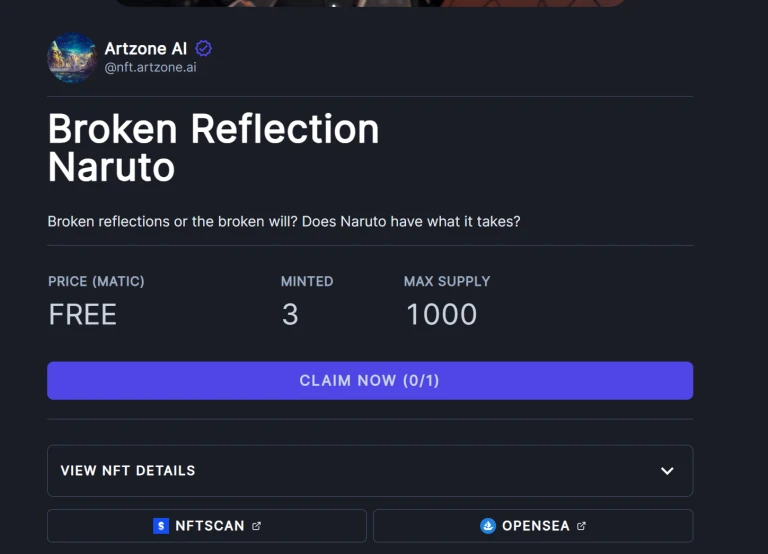
Complete the Claim Process: Hit the "Claim Now" button. then select "Purchase" button. A pop-up window will appear prompting you for a contract signature. Proceed by approving the required action to finalize your claim.
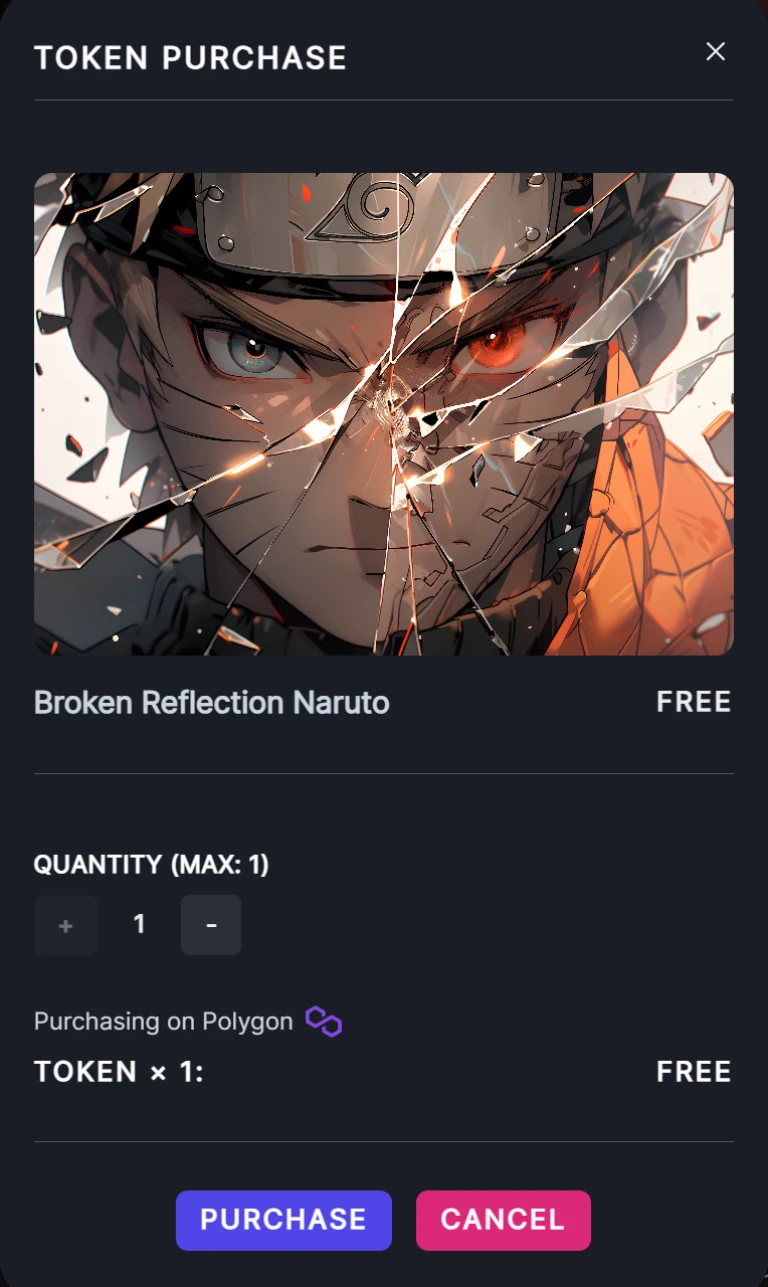
Confirmation: After successfully claiming the NFT, a confirmation pop-up will inform you that you have successfully claimed the NFT.
View Your NFT in Your Profile: Your newly claimed NFT should now be visible in your profile. If it does not appear immediately, please allow a few seconds for the system to update.
Accessing NFTs Directly from Your Profile:
Navigate to 'Owned' Section: Go to the 'Owned' section in your profile to view your NFT collection.
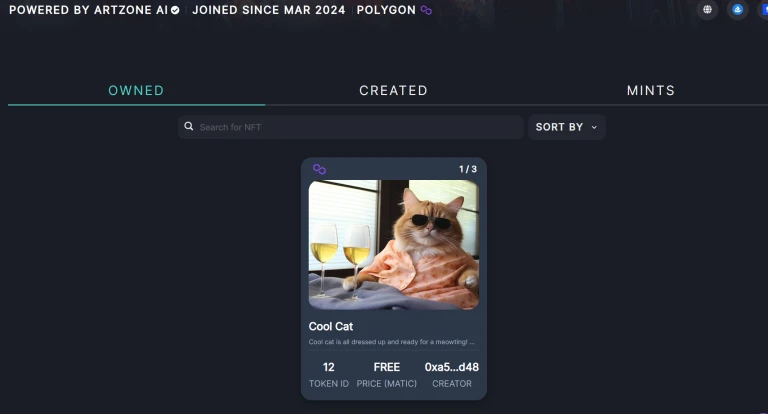
Select an NFT: Click on an NFT to open its details page. Look for direct links or buttons labeled for OpenSea and NFTSCAN.
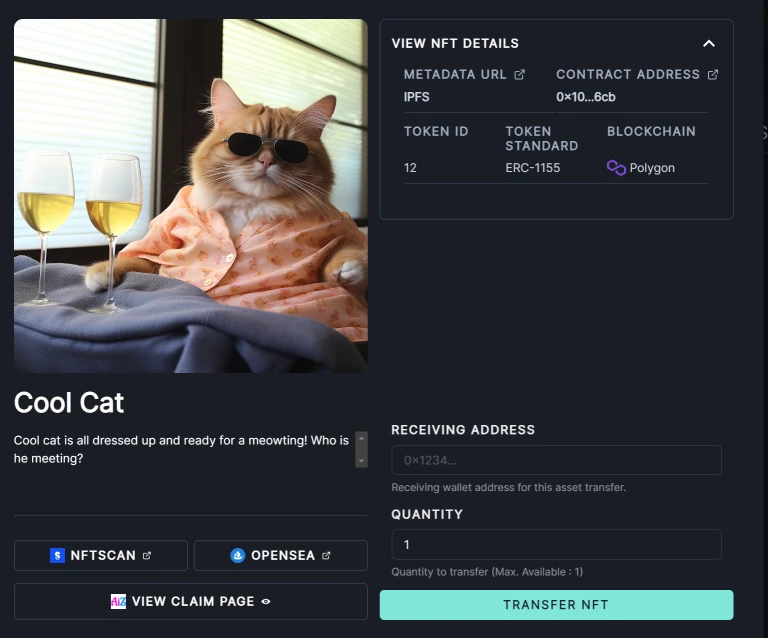
View on Platform: Clicking these buttons (NFTSCAN or OPENSEA) will redirect you to the respective platform, where you can view your NFT in detail.
Using the Contract Address to View NFTs:
Locate Contract Address: Open an NFT's details in your profile and find the 'Contract Address' by clicking on "View NFT Details".
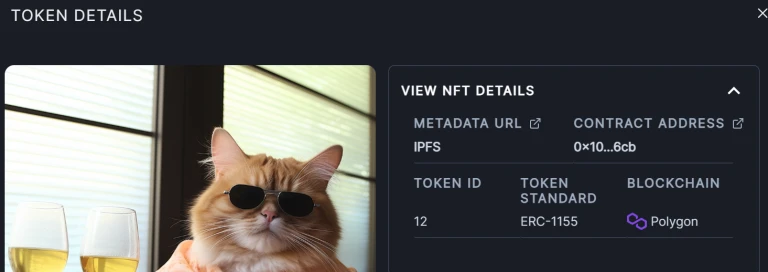
Click on the contract address and it will be redirected to the Polygonscan page where you can see the details of the NFT.
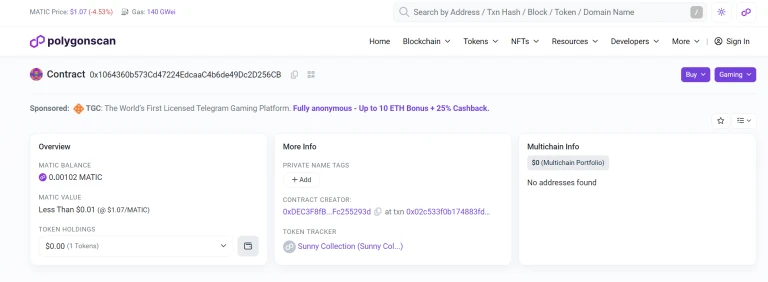
You can also copy the contract address in the Polygonscan page and copy paste it in any other scanner as well to verify the details.
Copy and Paste: Copy this address and paste it into the search or verification field of any NFT tracking platform, like NFTSCAN.
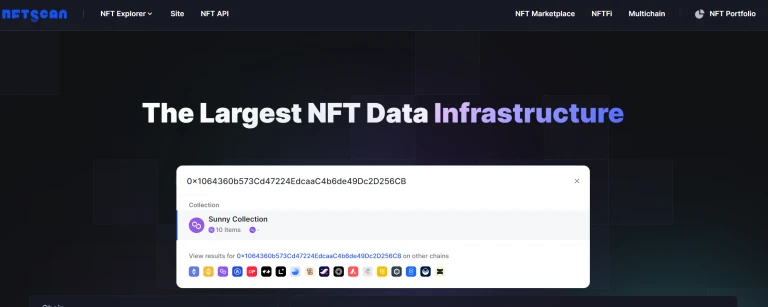
View NFT: This method allows you to verify transactions related to your NFT and view it on the platform.
Transferring NFTs to Metamask or Other Wallets Without Charges:
Access Your NFT: From your profile section, open the NFT you wish to transfer.
Prepare for Transfer: Scroll down to find the 'Receiving Address' and 'Quantity' options. Enter your Metamask wallet address and adjust the quantity if necessary (default is 1).
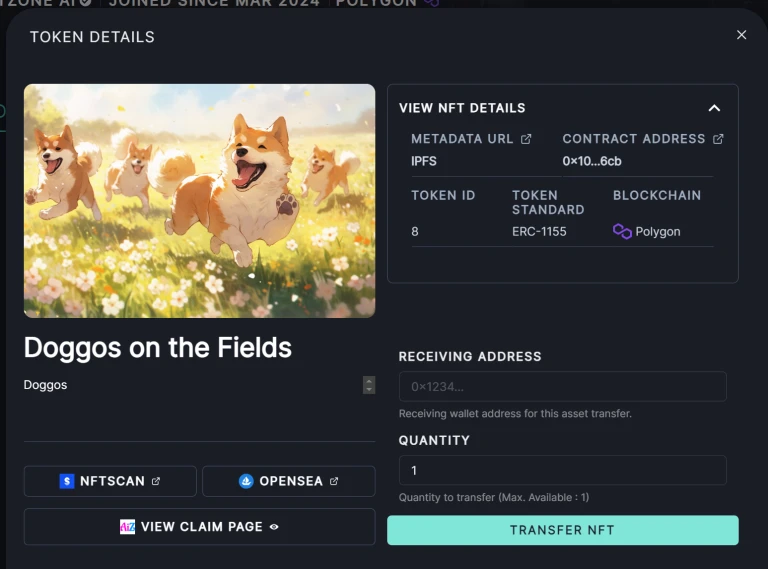
Initiate the Transfer: Click on the 'Transfer NFT' button to start the process.
Once you click on the Transfer NFT page, you will be prompted with a new window that asks to sign the contract and a small network fee will be required to transfer the NFT.
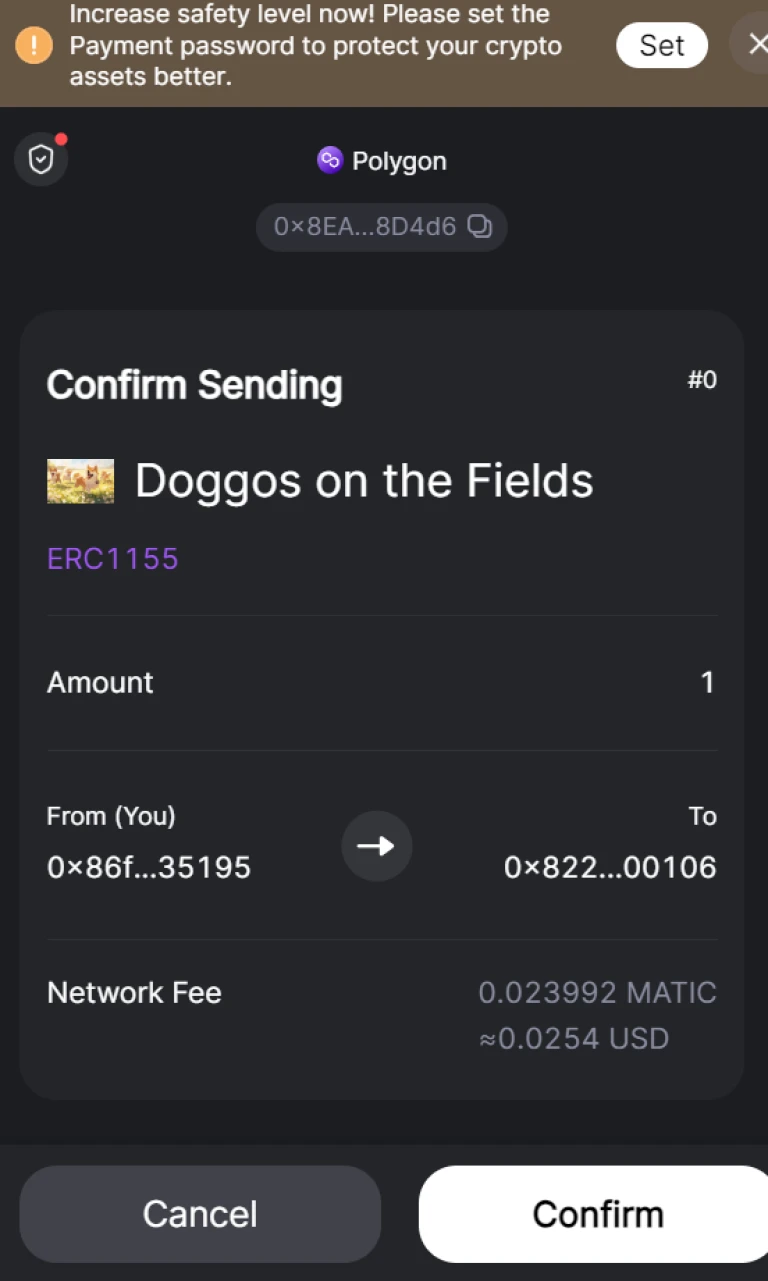
Click on confirm and sign the contract and that's it.
Verify the NFT in Your Wallet: The NFT should now be visible in your Metamask wallet.
Adjusting Visibility in Metamask:
Go to Portfolio: Navigate to your Metamask portfolio section.
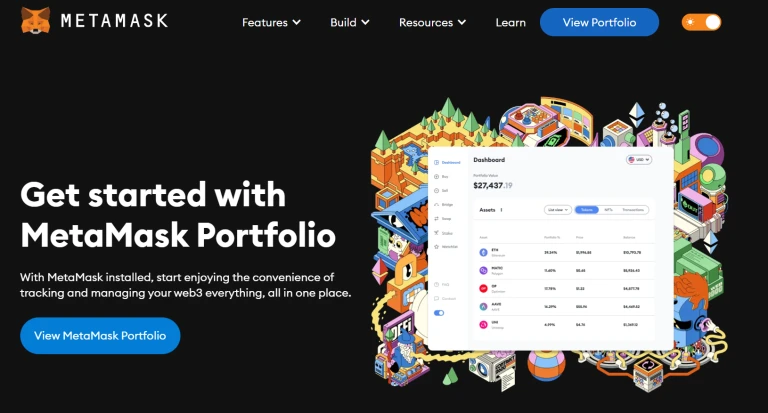
Locate Hidden Tokens: Under the dashboard, select "More Options" > "Hidden Tokens" to find your NFT.
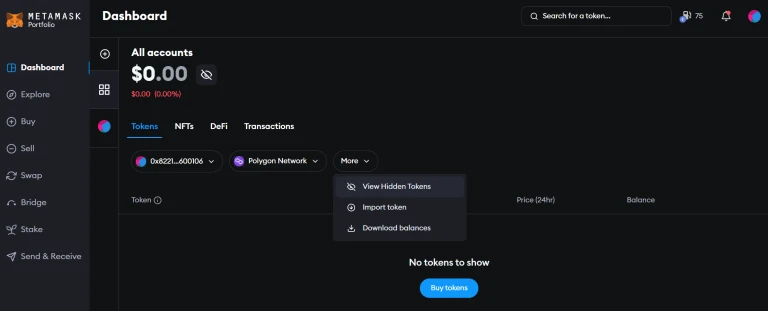
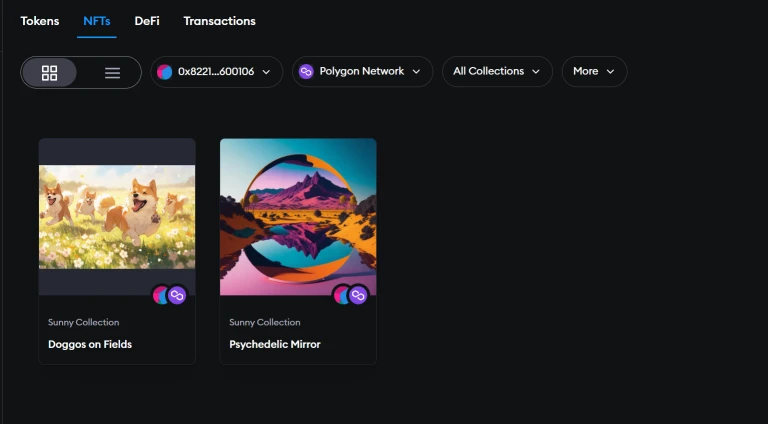
By default it will be under tokens, change it to NFT section beside it.
Click on more and select -> View Hidden NFT's
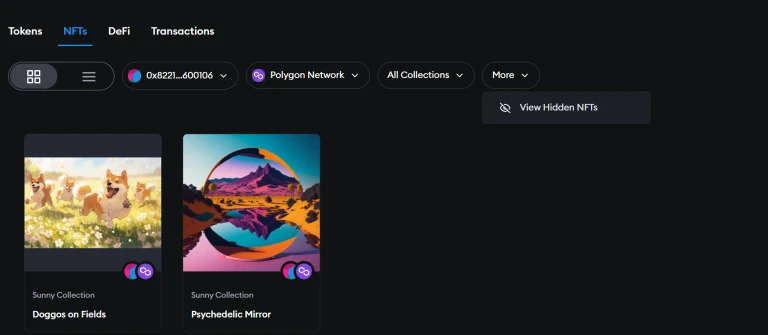
Once the Hidden NFT's are shown, be aware of other spam NFT's already on the list. Make sure to only unhide the NFT's that are from your collection or from Artzone.
Unhide NFT: Click on the three dots beside the NFT and select 'Unhide NFT'. Confirm your action to ensure the NFT appears in your portfolio section.


